Create user in TYPO3
To work in TYPO3, you must be created as a user. To be created as a user, you need to contact a user administrator for the pages you wish to access. If you don’t know who the user administrator is for the page you need access to, you can contact your local support team, and they can help you find out.
Once you have been created as a user, you can log in to TYPO3 via the page typo3.au.dk using your AUID and associated password.
If you have issues logging in, you can contact your local support.
Note that we also refer to a TYPO3 user as an editor.
How to create new users
To create new users in TYPO3, you need to have the role of user administrator.
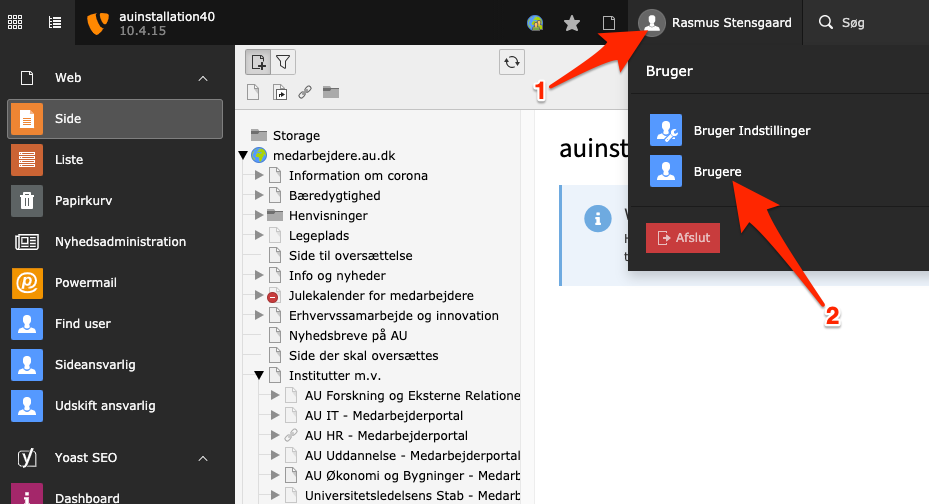
- Click on your own name in the top right corner.
-
In the menu that appears, click on Users.
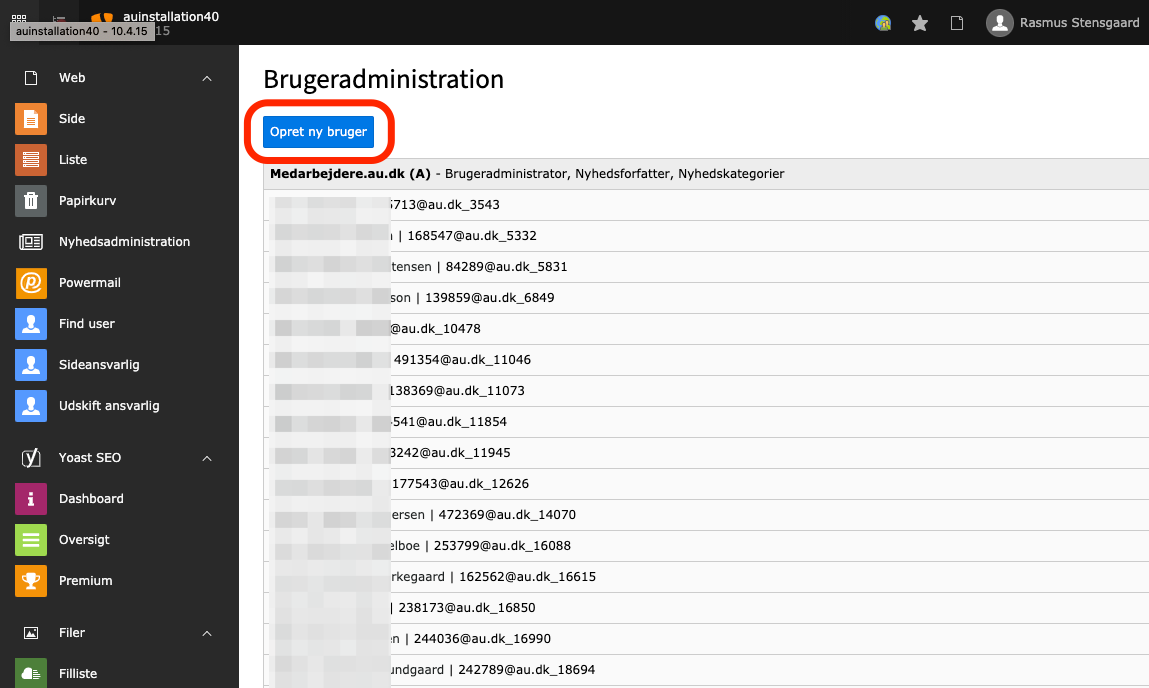
Click on Create new user.
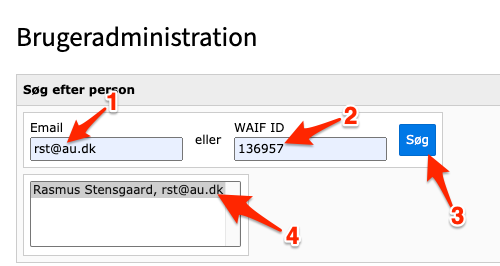
You now need to search for the user you want to grant access to. You can search for the person by either email or AUID.
- Enter the email address of the AU employee who should have access to TYPO3.
- Alternatively, you can search by the person's AUID.
- Click on Search. (If you have filled in both fields 1 and 2, you will get an error. Only one of the fields should be filled in.)
- Now select the person from the list.
You can now choose to either add the person to an existing user group (i.e., grant access to an already created role) or create a new user group (i.e., set up a completely new role).
Add to existing user group
It is generally easiest and fastest to give the user access to an already existing user group. Always check if the user access you want to provide might already exist. This way, users with access to the same pages are grouped into the same roles, rather than creating a long list of different roles that provide access to the same pages.
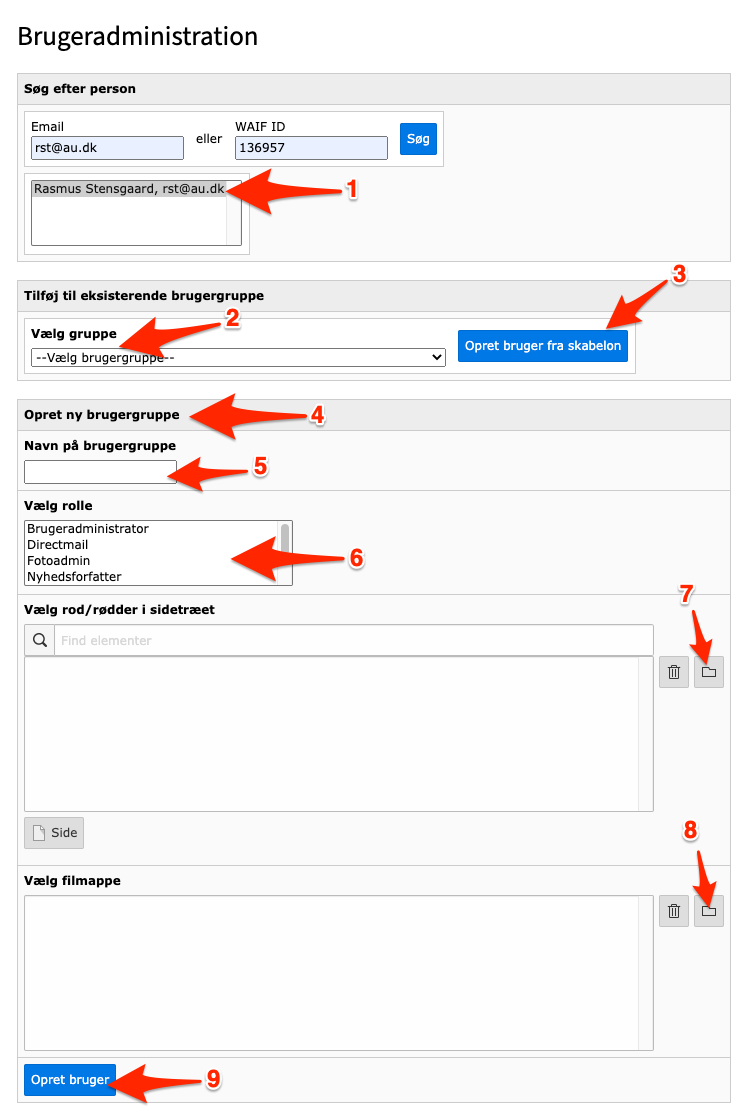
(See image below.)
- Click on the name of the user you searched for.
- Open the drop-down menu and select the role from the list to assign to the user.
- Click on Create user from template.
The user is now created with the same rights as other editors with that role.
Create new user group
If there isn't an existing user group that fits your needs, you can create a new user group.
(See image below.)
5. Enter the name of the user group – refer to the guide on naming user groups further down the page.
6. Then select the roles that the editor should have. Use Ctrl+click to select multiple roles. A standard editor should have the role of Editor. If the editor needs to create news, they should also have the roles of News Editor and News Categories. If the editor needs to be a User Administrator, i.e., able to create other users and modify page settings, you should select User Administrator.
7. Choose the pages in the page tree that the user group should have access to. A new window with the page tree will pop up. Here you can click on the pages you want to assign to the user role. Subpages will automatically be included. Close the page tree window when you are done selecting pages. You can always return later to add or remove a page.
8. All user groups need to be linked to a folder for files. Navigate to the relevant folder and click on the folder's title to add it to the user group. Note that you now need to click on the folder icon in the right column to assign it to a user role. Close the folder window. You can always come back later to add or remove a folder.
9. Click on Create User. This will create the new group and editor simultaneously. You can then add more editors to the group as described above under Add to Existing User Group.
Delete users
Before you delete a user, you should consider whether the person is responsible for any websites from which they need to be removed first.
- See how to change responsibilities and page owners.
- If the user is a news editor, they will still appear as the author of news and events after you delete them from the user module.
Once you have ensured that your pages will not lack a contact person, you can delete the user as follows:
- Click on your own name in the top right corner.
- In the menu that appears, click on Users.

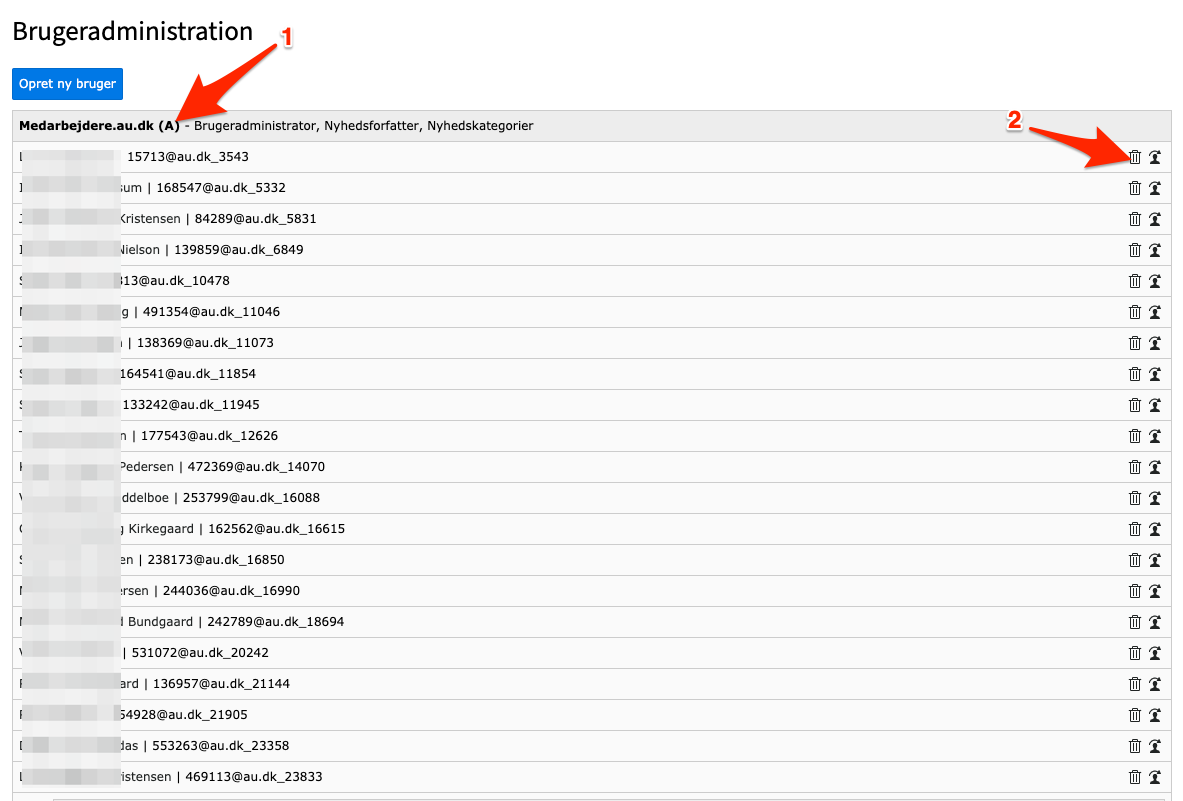
- Here you can see the roles of different users.
- Locate the correct role and user, then click the trash can to delete the user and click OK to confirm.
A user group is automatically deleted when the last user in the group is removed.
Edit user group
- Click on your own name in the top right corner.
- In the menu that appears, click on Users.

-
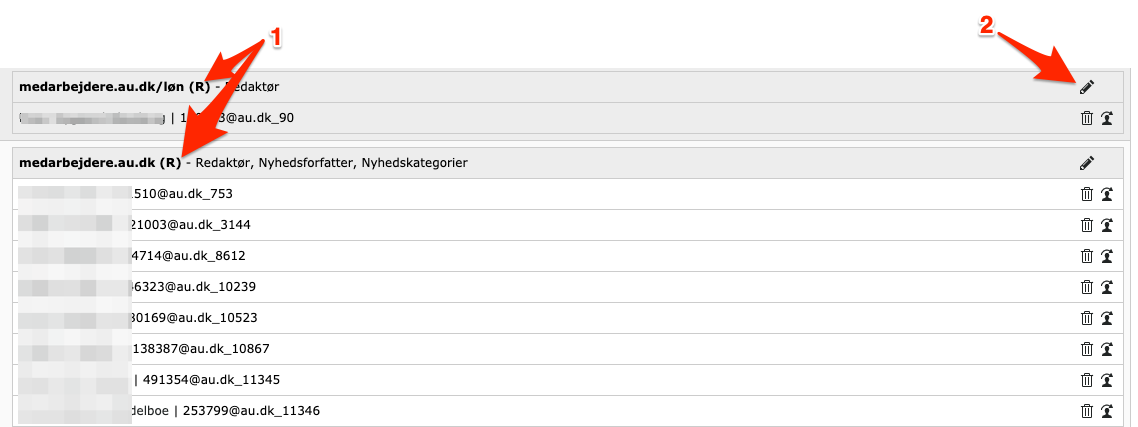
Here you can see a list of the different roles you have access to. Find the role you want to edit.
- Click on the pencil icon. You will now have the option to change the role's name, as well as which pages and files the role should provide access to.
Naming user groups
When creating new users in TYPO3, ensure you use the following format for naming user groups:
address/[subdivision/][content] (user type)
- Address = URL for the domain before .au.dk. For our major domains (studerende.au.dk, medarbejdere.au.dk, and au.dk), use the full domain – e.g., Cas, Health, au.dk.
- Subdivision = On large domains, it may be necessary to further subdivide users, which is optional. Examples of subdivisions could be medarbejderservice, Arts, etc.
- Content = Should be a descriptive text that provides insight into what specific content the user has access to. Examples include udvalg, forskning, eksamen, etc.
- User type = Specifies the level of access the user has. We use (A) for administrators, (R) for editors, and (N) for news editors.
Examples of user groups:
- studerende.au.dk/arts/eksamen (A)
- cas (A)
- cas (R)
- cas/forskning (R)
About user groups in TYPO3
User groups are organized hierarchically.
This means that a user group can have access to, for example, a, b, c, and a user administrator of this group has the ability to create a new user group underneath it, which might only have access to a and b.
If a user administrator has access at multiple levels (for example, a member of a user group with access to a, b, c, d, e and another group with access only to a, b, c) and wishes to create a new subgroup with access only to, for example, a and c, then this subgroup should be created from the closest user group where the user administrator has access, i.e., the user group with access to a, b, c.
This ensures the most manageable hierarchical structure:
User Group "abcdefgh..."
User Group "abc"
User Group "ab"
User Group "ac"
A user group can be deleted when there are no subgroups. Additionally, a user group is automatically deleted when the last user in the group is removed.