Upload files in the filelist
Please note that you can upload a file with a maximum size of 200 MB.
In TYPO3, files (PDFs, images, etc.) are stored separately from the web pages. You can access files through TYPO3's Filelist module, where you can create folders and upload files. It’s also possible to upload files while working in TYPO3’s editor, but there are several advantages to using the Filelist. There, you have a clear overview of the folder structure and can work with multiple files at once.
Before uploading documents to the Filelist, ensure you check the copyright if you are unsure. Be cautious about uploading your own or others’ research, images, newspaper articles, or similar content.
How to upload files to the Filelist
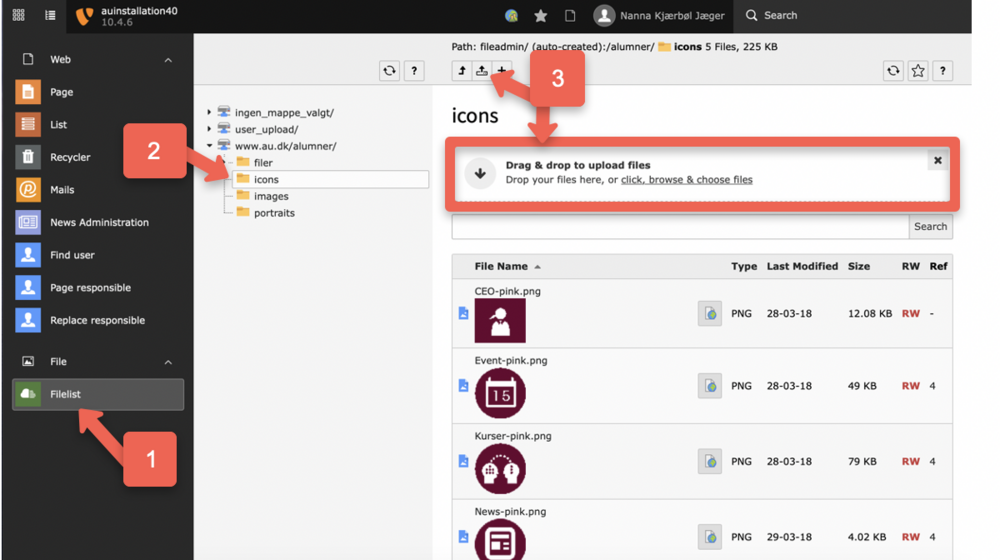
- Start by clicking on Filelist under Files. You will now see the file structure you have access to.
- Click on the icon for the folder you want to upload your file to. Avoid placing files in the folder named 'no_folder_selected.'
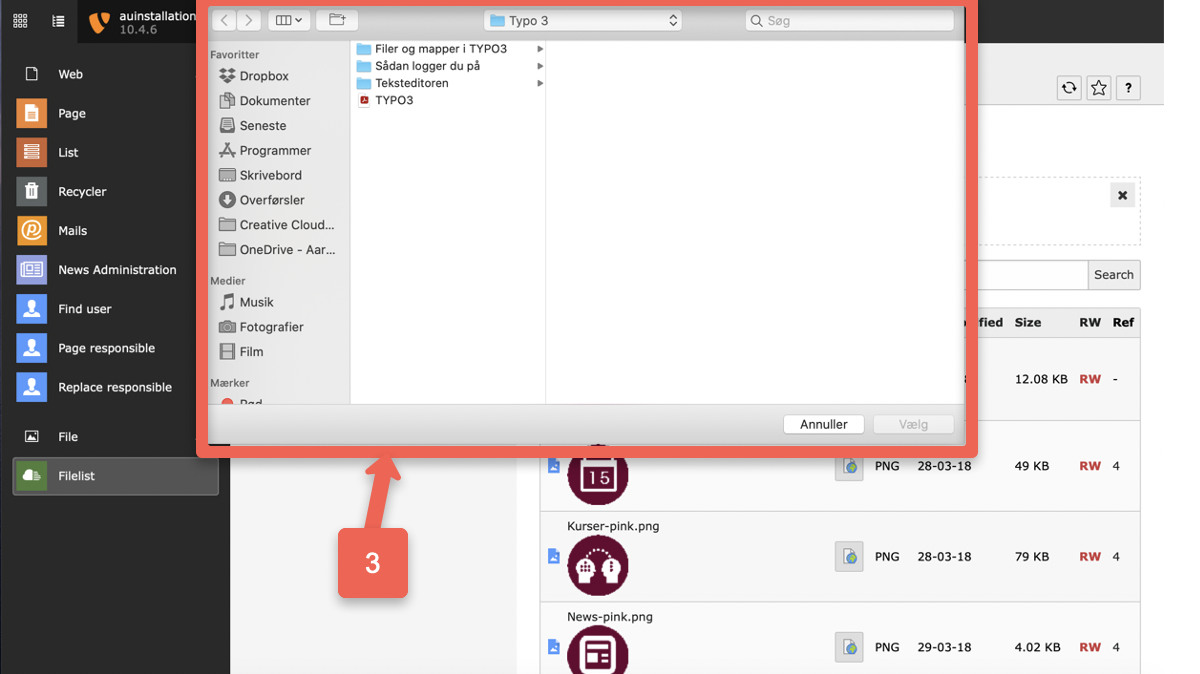
- There are two different ways to upload files. First, click on the Upload Files icon. This will automatically open File Explorer..
- You can either select one or more files in File Explorer and click Open, which will upload the files to the chosen folder.
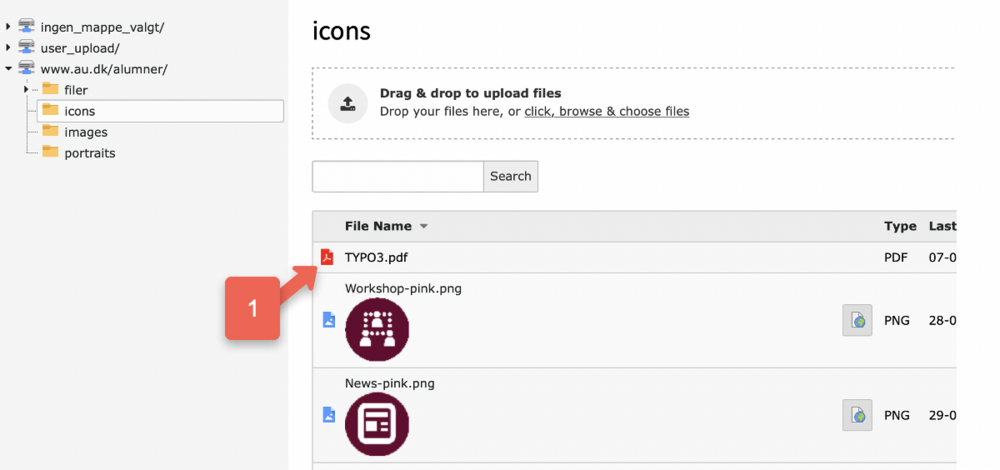
- Alternatively, you can click Cancel in File Explorer and use Drag-and-Drop instead, which will place the files in the selected folder.
- In the file list, duplicate file names are not allowed. If you try to upload files with names that already exist, TYPO3 will present you with options on how to handle them. Choose 'Overwrite' from the dropdown menu if you want to replace the existing files with the same name. Select 'Rename' if you want to give the new file a different name — TYPO3 will automatically rename it, usually by adding _01 to the file name. Choose 'Skip the file' if you want to cancel the upload. If you're uploading multiple files with existing names, you can apply the same option to all files or choose a different option for each one

Move, copy, rename, or delete a file
You can move, copy, or delete a file as follows:
- Click on the icon for the file you want to edit. In the pop-up menu, you can choose the following options:
- Rename: Click on Rename to give the file a new name.
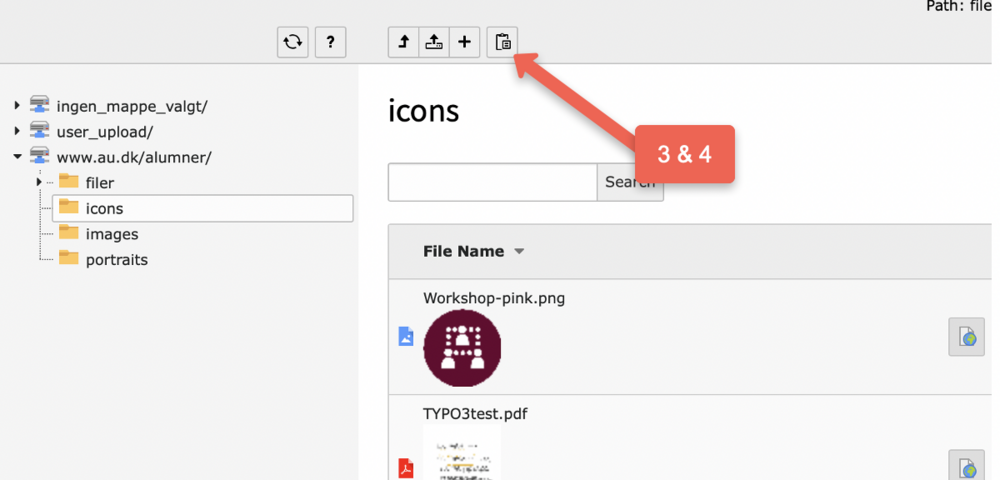
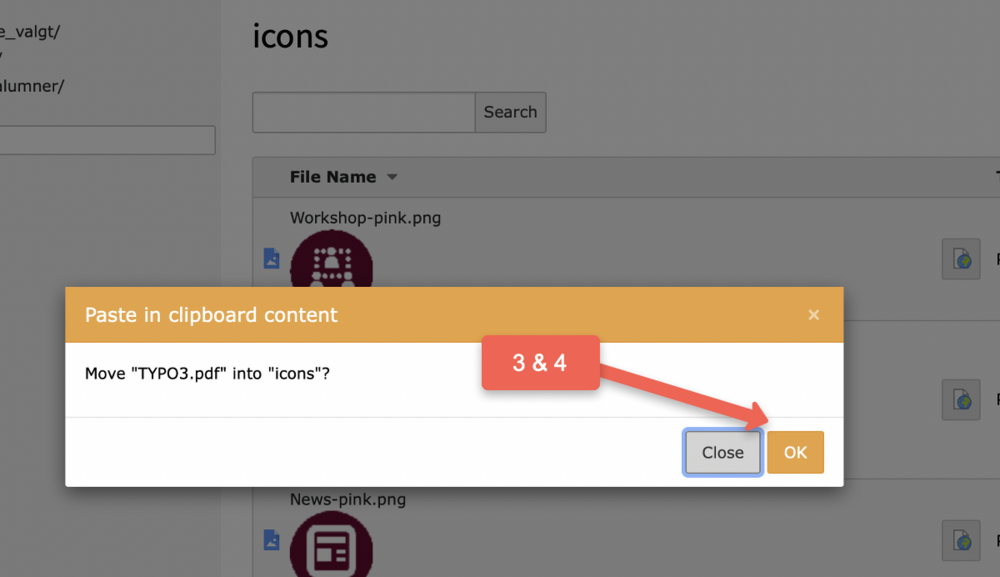
- Copy: Select Copy. Then, choose the folder in the Filelist where you want to copy your file. After selecting the folder, click the clipboard icon. In the dialog box, confirm that you want to paste the file into the selected folder. Your file will now be copied to the chosen folder.
- Move: Select Cut. Then, choose the folder in the Filelist where you want to move your file. After selecting the folder, click the clipboard icon. In the dialog box, confirm that you want to move the file to the selected folder. Your file will now be moved to the chosen folder.
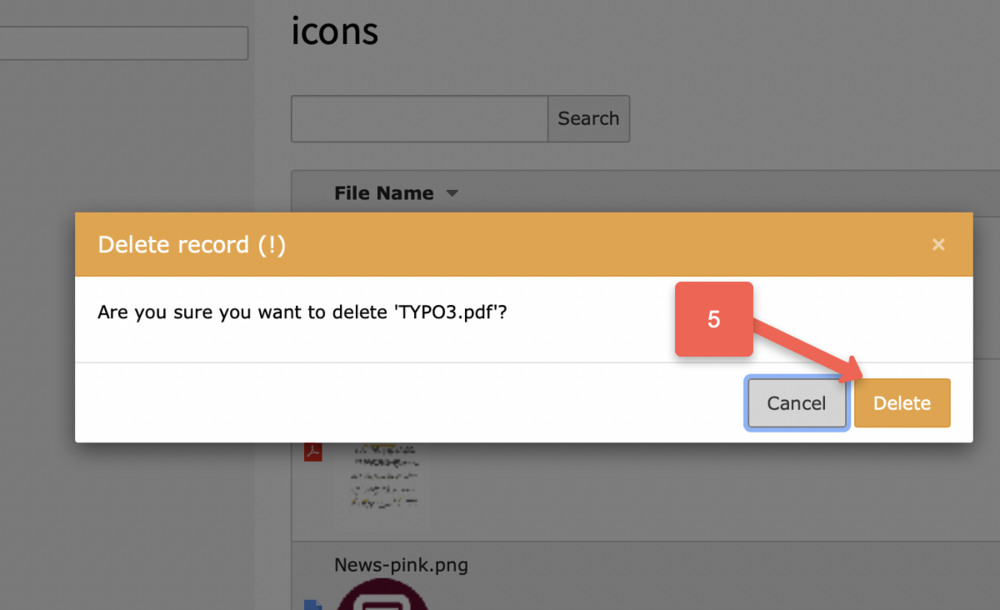
- Delete: Click Delete to remove the file completely from the server. Be cautious when deleting files from the Filelist. After selecting Delete, you will need to confirm your choice in the dialog box.
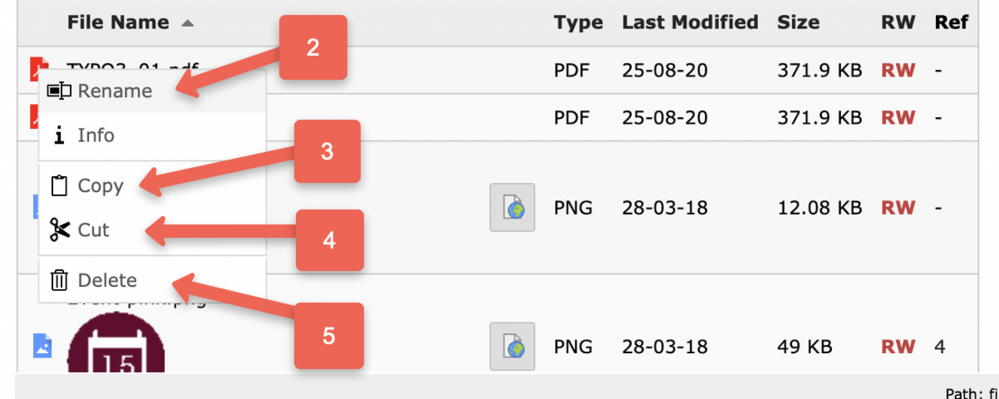
You can choose to enable Extended view at the bottom of your file overview. This will display the icons for Delete, Copy, Cut, and more.
Create new folder
- Click on the folder where you want to create a new folder inside.
- Click on New (the small + icon).
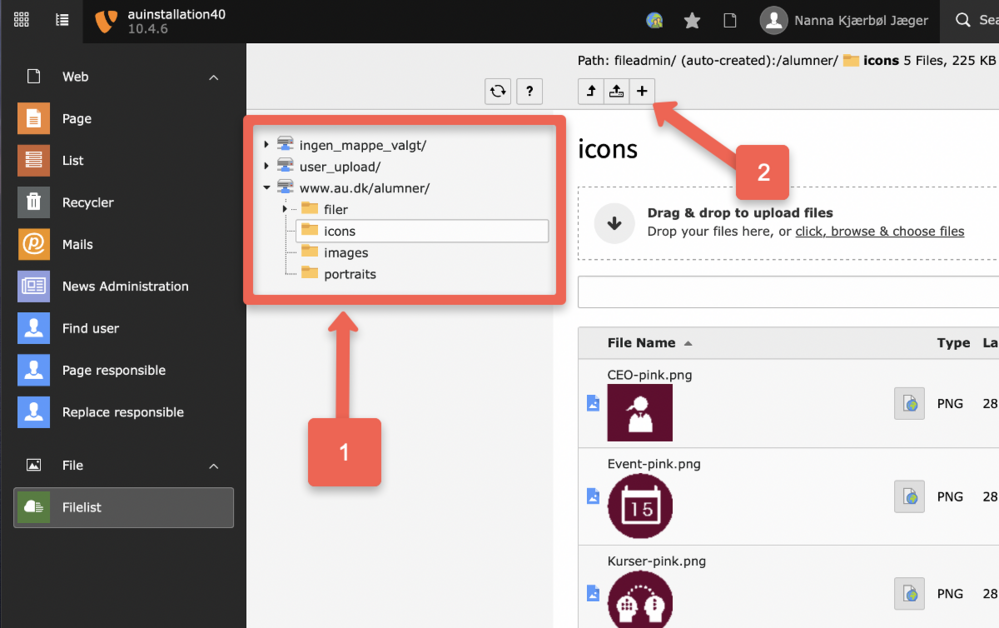
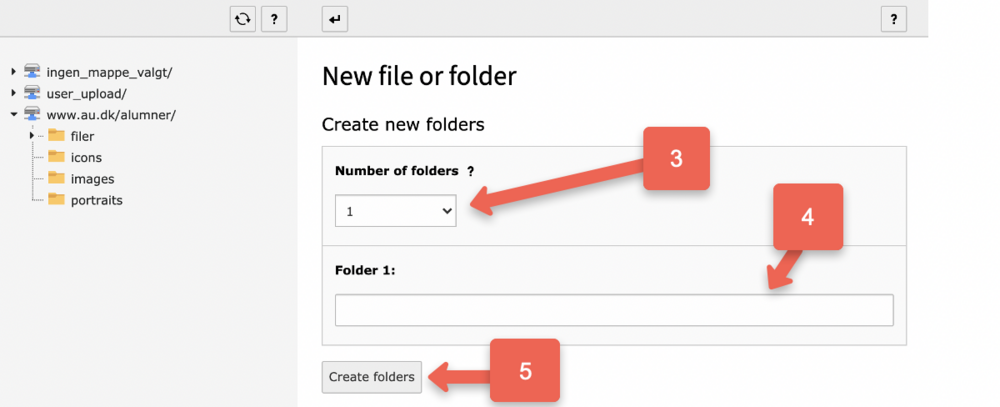
- Select how many folders you want to create.
- Name the different folders.
- Click on Create folders. The new folders will now appear in the tree, and you will be able to upload files into them.
Rename a folder
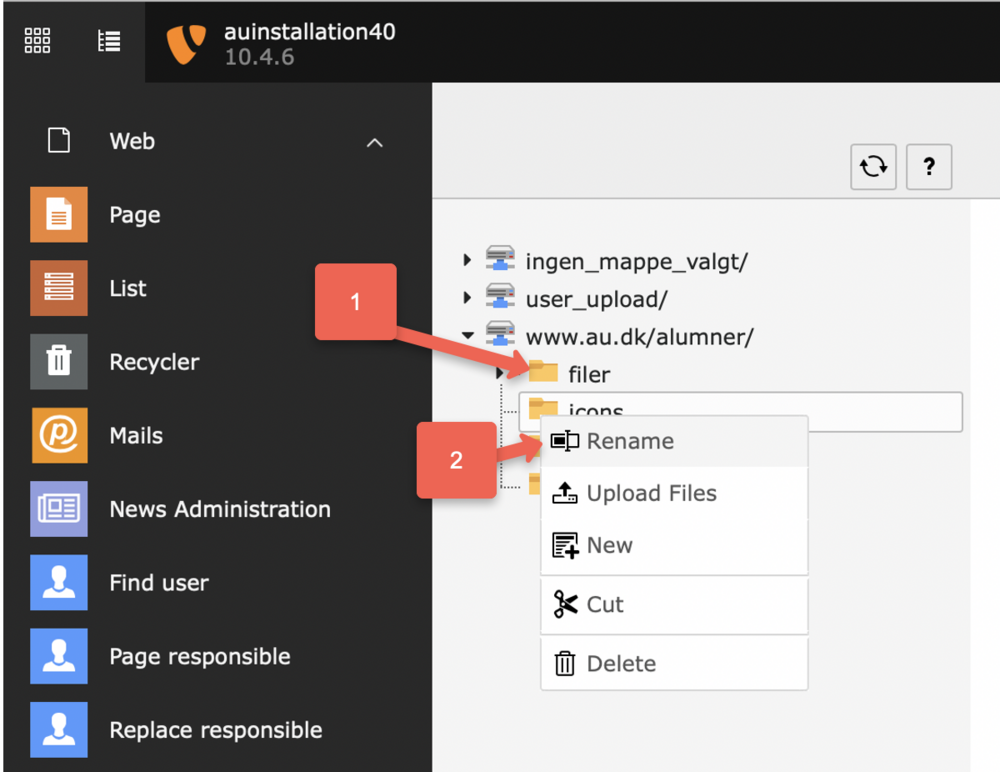
If you want to rename a folder that is already in the file list, you should:
- Click on the folder's icon
- Choose Rename
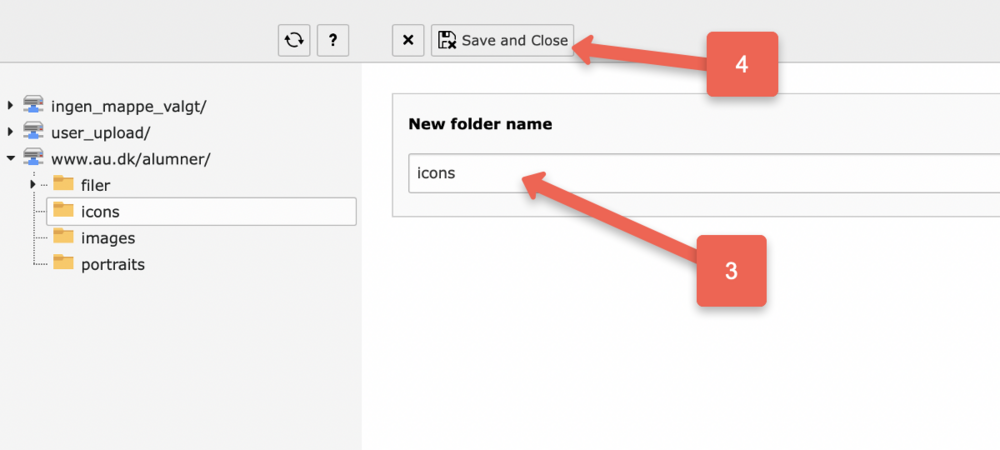
- You can now give the folder a new name.
- Finish by clicking on Save and Close.
Move, copy, or delete multiple files at once
- In the file list, make sure that Extended view and Show clipboard are enabled. You can find these options under the contents of the folder you are in.
- Click on Clipboard #1 (multi-selection mode). Checkboxes will now appear next to all items in the file list.
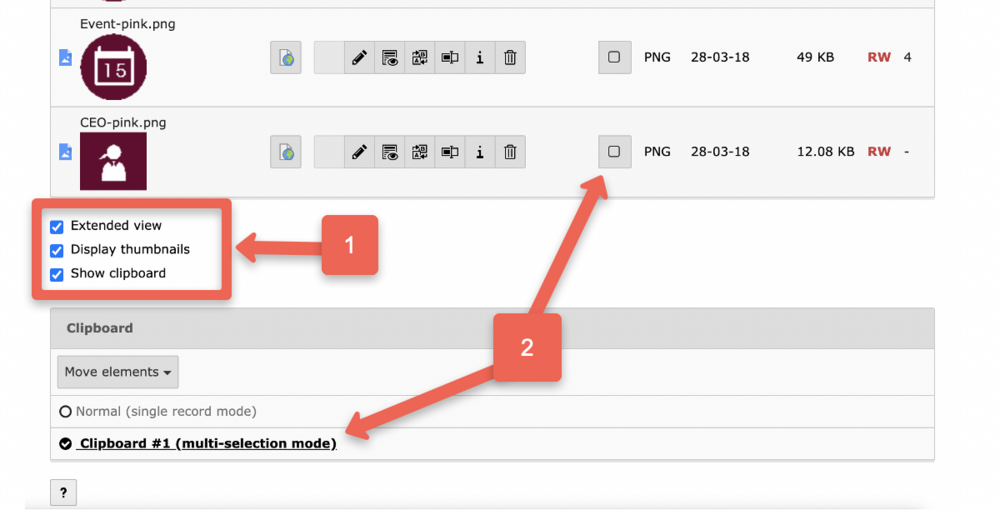
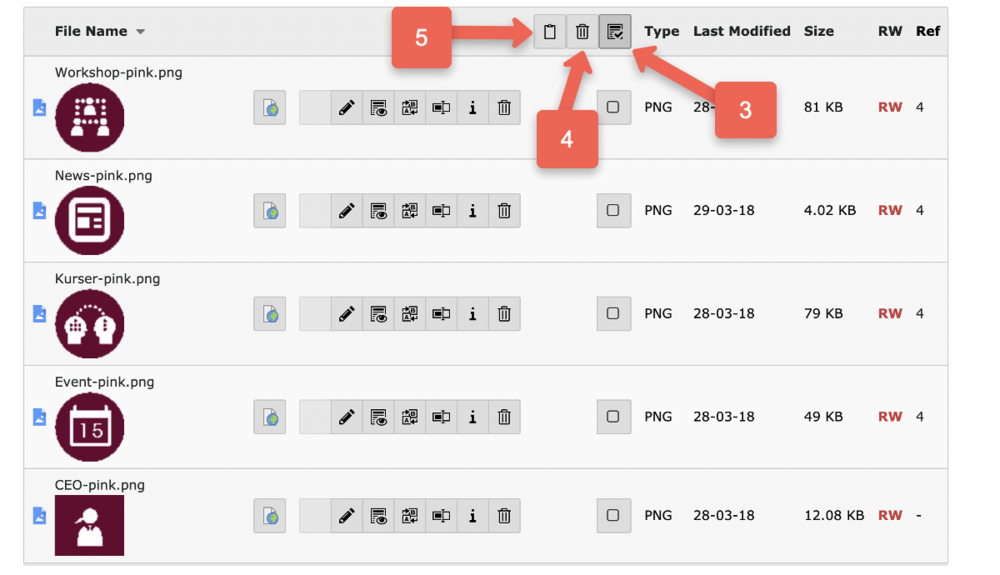
- You can either select individual files or choose all of them by clicking on select all/deselect all.
- DELETE: To delete the items, click on the small trash can icon.
- To cut or copy the items, click on the clipboard icon to transfer the selected files to the clipboard.
- Choose whether you want to move (cut) or copy the files. You will find the menu below the contents of the folder you are in.

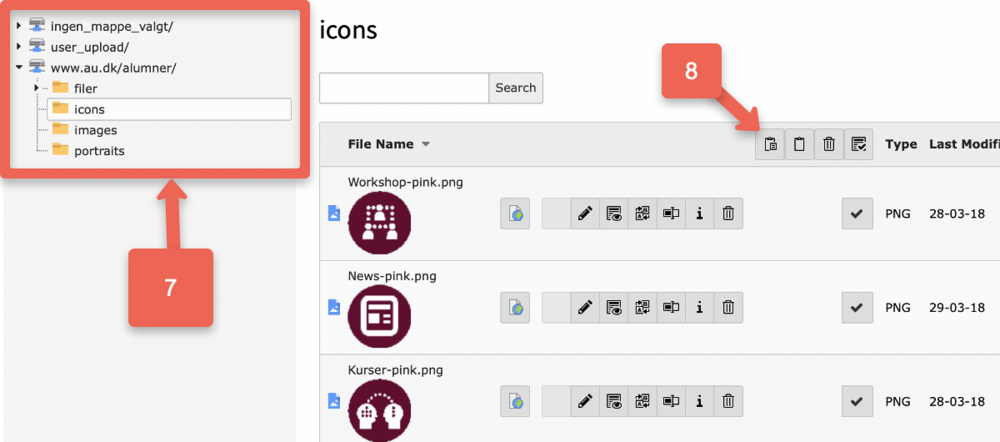
- Click on the folder where you want to copy or move the files.
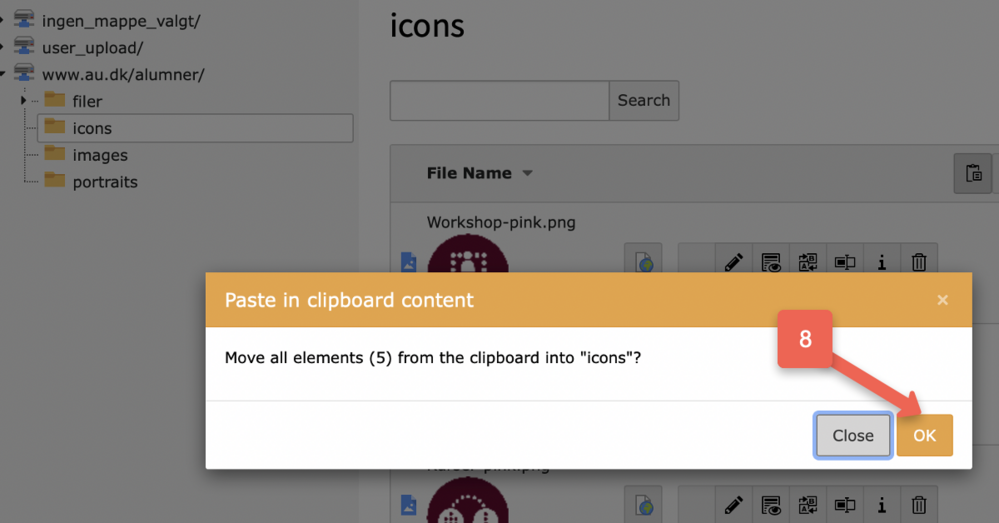
- Click on 'Paste clipboard contents.' In the dialog box that appears, confirm that you want to copy/move the selected items by clicking 'OK.'
Note: Be aware that it is not possible to copy an entire folder in the file list. However, there is a workaround: Create a new folder at the destination where you want to copy the folder. Then copy all the files from the original folder and paste them into the new folder.
It is also not possible to delete a folder in the file list until it is empty. There must be no files or subfolders inside. If you attempt to delete a non-empty folder, you will receive the error "".
If you are dealing with folders containing hundreds of files you may contact your local support department, for assistance with the copying process.
Search for files in the file list
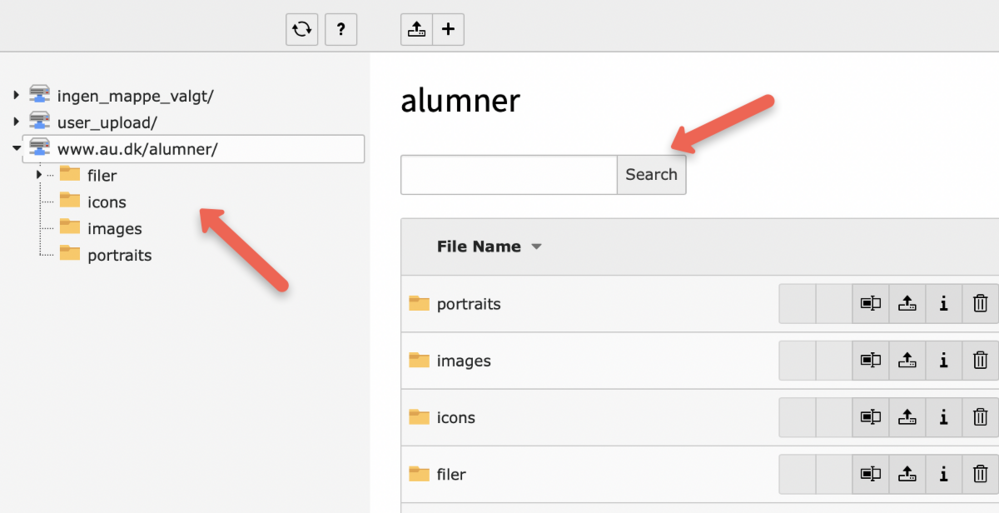
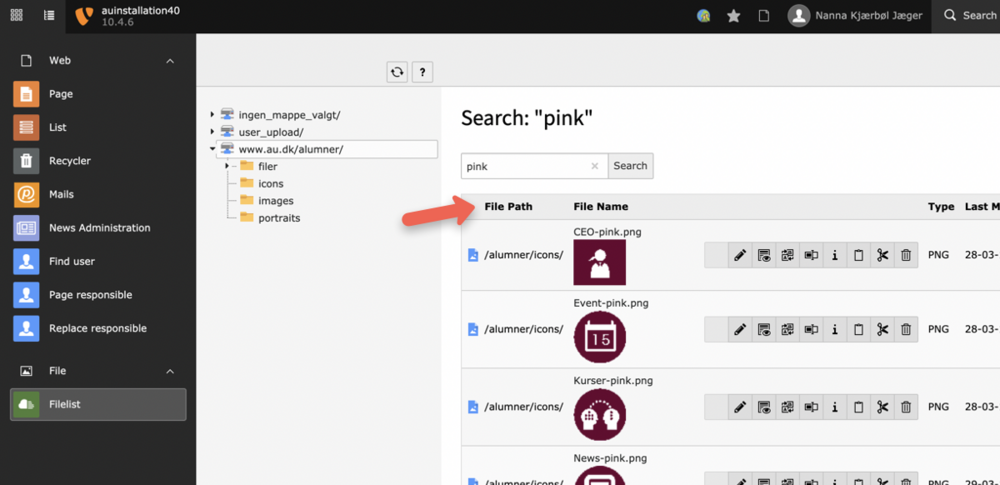
- You can search for file names or parts of file names in the search field. Click on the folder in the file list where you want to search. After typing your search term and pressing Search, you will see a result list with files that include your search term in their names. You can then view the file's location in the file list.
- If you need to link to a file from a content element and do not have access to the search field, use your browser’s Ctrl+F (Find function) to locate the file.
- Please note that it is not possible to search within the contents of files.
Find the element that links to your file
If you can see a reference to your file in Filelist but don't know which page or element links to it, follow these steps:
Example:
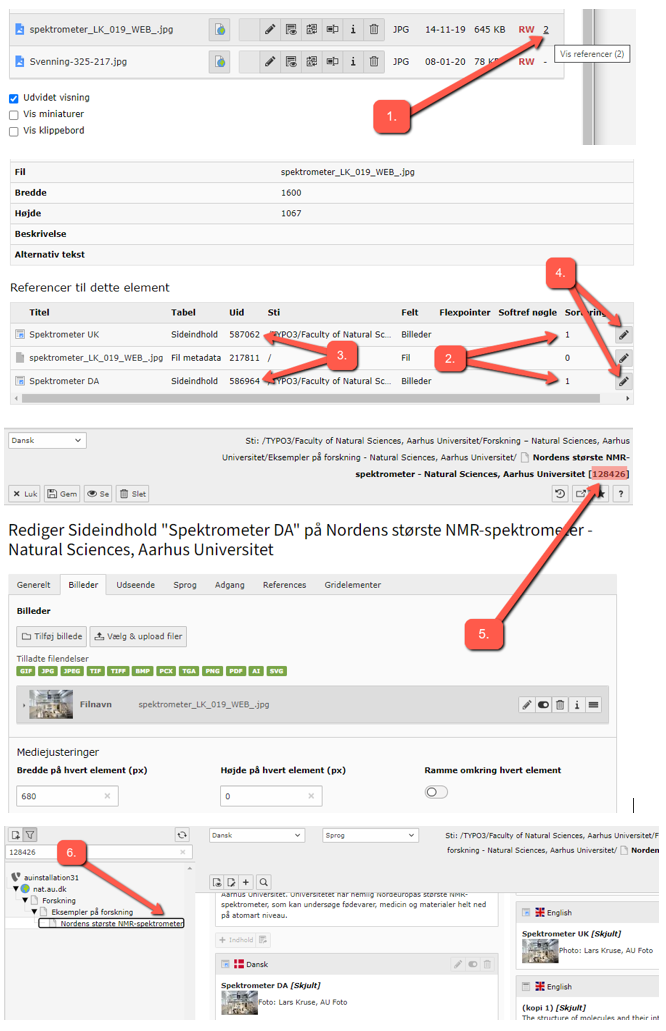
- You have an image in Filelist (e.g., spectrometer_LK_019_WEB_.jpg) that is used in two places. Click the number 2 (in the Ref column in Filelist). This will open an overlay with details about the image.
- Scroll to the bottom of the overlay. TYPO3 will list references to the current file (the image). In this case, the file is linked from two places: a Danish element and its corresponding translation.
- TYPO3 will list the element IDs for both elements
- To find the ID of the page where the element is located, click the pencil icon. The standard language page and its translated version share the same page ID, so you only need to open one of the elements (in this example).
- You are now inside the element containing the current image. There could also be a link to the image or, for example, a link to a PDF. You can edit the element and click Save. Note the page ID (here, 128426) in case you need to revisit the page in the page tree in the backend.
- You can copy/paste the page ID into the Filter Tree to navigate directly to that page.
If the editor group you are logged into does not include access to the file in Filelist, you will need to contact your TYPO3 support.
