PDF accessibility on websites
PDFs are a major focus area in web accessibility. PDFs have some of the same challenges as typical text errors, such as the inability for screen readers to navigate headings, tables, and lists unless these elements are specifically tagged when the PDF is generated.
Avoid using PDFs on your website if possible, as they generally provide a poor user experience on mobile devices due to scaling issues. Users will need to zoom and scroll horizontally to read a PDF file on a mobile phone. However, there may be cases where creating a PDF makes sense. When you publish a PDF on your website, there are several tools you should be aware of.
Use Siteimprove to get an overview
Siteimprove provides a clear overview of the current PDFs on your site that have accessibility issues. In the tool's Accessibility module, you get a summary of PDFs with problems, the number of issues, and the types of problems encountered. Go to Siteimprove's overview of problematic PDF's on your website.
Guide to improving PDF Accessibility
You can check and improve accessibility in the PDFs you create using either Office Word or Adobe Acrobat Pro. All AU staff have access to or can obtain these programs. The following content provides guides for accessibility checks in both programs.
Check accessibility in new PDFs
When there's a need to create new PDFs, you can use the accessibility tool in Word. First, ensure that you have the latest version of Word on your computer, as older versions do not support accessibility features. Start by checking that your version of Word is Office 365. Once you've confirmed this, you can open the document you wish to check for potential accessibility issues and convert into a PDF.
Give the document a title
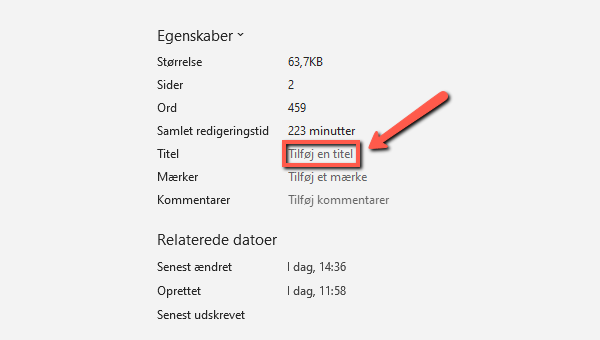
Give the document a title by clicking on the File tab in Word. Here, select the Info option, where you can fill in the document's title.

Specify which language the text is written in
Specify the document's language by clicking the language button in the horizontal process bar at the bottom of Word. Choose the language that the text in the document is written in.
![[Translate to English:] Den nederste proceslinje i Word, hvor brugeren kan klikke på sprog i proceslinjen og ændre sproget til eksempelvis dansk](/fileadmin/ingen_mappe_valgt/WORD_vaelg_sprog.png)
Check Accessibility
Now select the Review tab and the Check Accessibility button, and follow the original Microsoft guide from step 3 to complete the accessibility check. You should now address the errors listed under Inspection Results.
![[Translate to English:] Det lille ikon med teksten Kontroller Tilgængelighed i word.](/fileadmin/ingen_mappe_valgt/WORD_kontroller_tilgaengelighed.png)
Create the PDF correctly
Once you've fixed the accessibility issues or determined that there are no accessibility issues, you're ready to export your document. If you want to export the document as a PDF, it is important that you do not select the Print to PDF function. Print to PDF is intended for printing and the structure codes that help to make the document accessible will therefore be removed. Export the PDF by selecting the File tab and clicking the Export menu item. Then click on Create PDF/XPS document and select the Create PDF/XPS button. When you create the PDF this way, the formatting should be preserved.

Check the accessibility of existing PDFs
There may be situations where you don't have the original document that the PDF is based on and thus cannot create an accessible version of the PDF. In the Adobe Acrobat Pro tool, which all AU employees have access to, you can test the PDF for accessibility and make changes to the document directly within the tool. Start by opening the PDF in Adobe Acrobat Pro that you want to test for accessibility issues.
Select the Accessibility tool
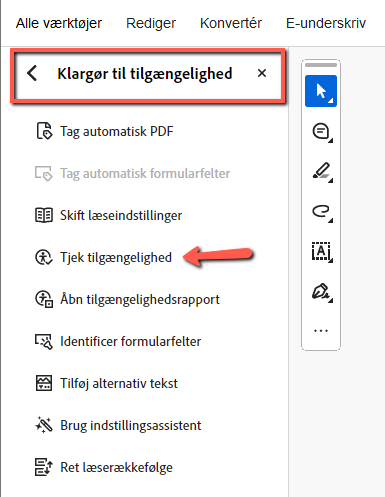
Select the All Tools tab. Once you've found All Tools, scroll down and find the Prepare for Accessibility icon. Click Prepare for Availability and select the Check Availability option.

Perform Accessibility check
The accessibility tool now opens in an on-screen dialog box. All checkmarks should be automatically ticked in the boxes and if not, add them manually. Then click on the Start Check button.

Review the list of accessibility errors
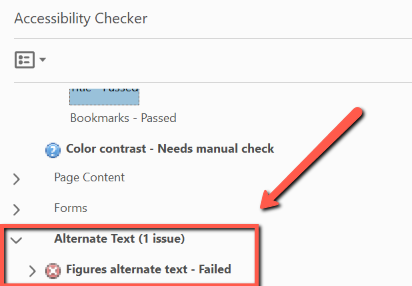
When the check is complete, you will receive a list of accessibility errors found in the PDF. The list appears in a panel on the left side of the program. Continue the accessibility check and follow the guidance for resolving issues from Adobe's original guide starting at step 6.
Once you have resolved the errors and addressed any issues requiring manual review, you are ready to save the PDF with corrections and finish the accessibility check. If you are unsure about how to handle a particular error, you can consult Adobes guide.

More tips and tricks for Adobe's accessibility tool
Here is a suggestion for short, quick start videos that show you how to easily add a title to your PDF or alternative text to an image. The videos are found on YouTube:
Do I need to make all PDFs accessible?
PDFs published before September 23, 2018, only need to be made accessible if they are 'necessary for active administrative processes.' An example is guides that assist users in an administrative process. In Siteimprove, you can use a filter to see which PDFs were published after this date. Additionally, you should assess which PDFs on your site are most important to address first. Prioritize those that are used by the most people.
