Insert tables
There are two ways to create tables in TYPO3.
1. Embed tables with Table Wizard
1. Embed tables with Table Wizard
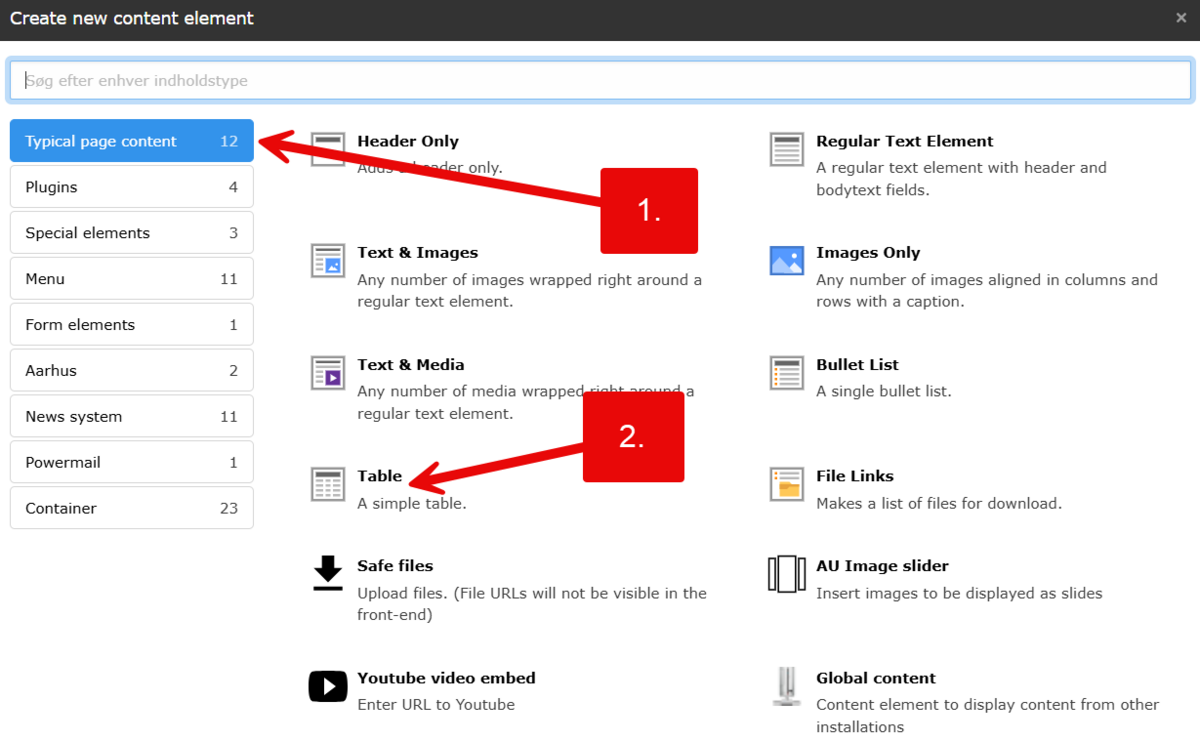
- Select Typical page content
- Select Table
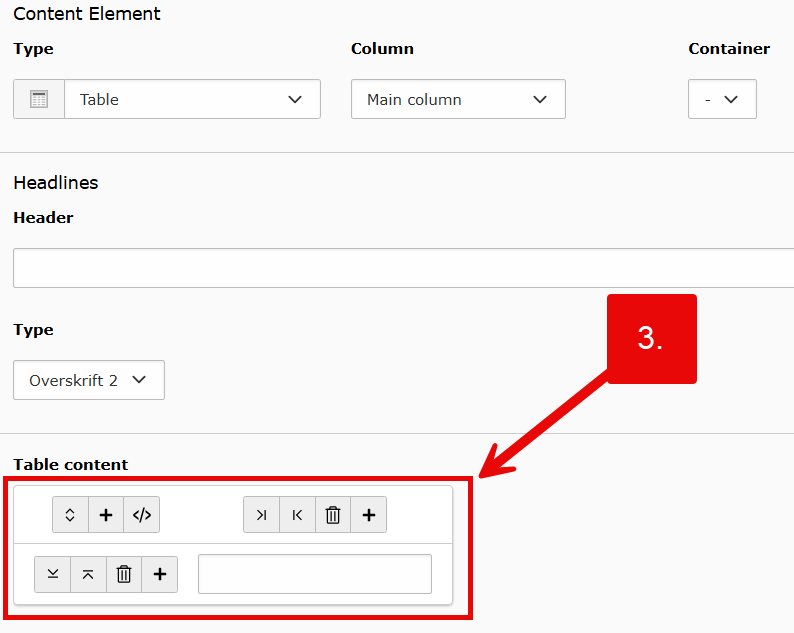
- The table wizard opens with one single cell
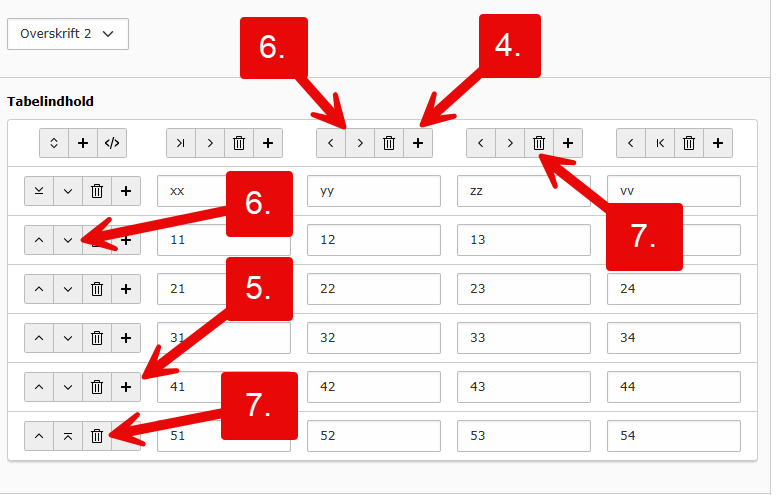
- Add column to the right
- Add row below
- Move left, right, up or down
- Remove column or row
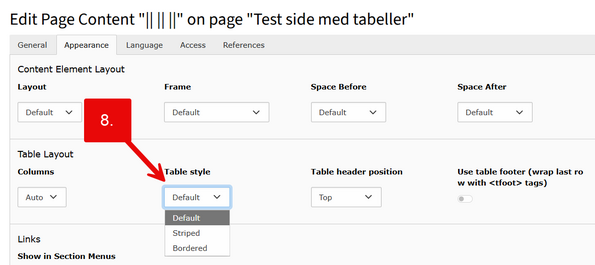
- Change table style from Standard to Striped or Bordered
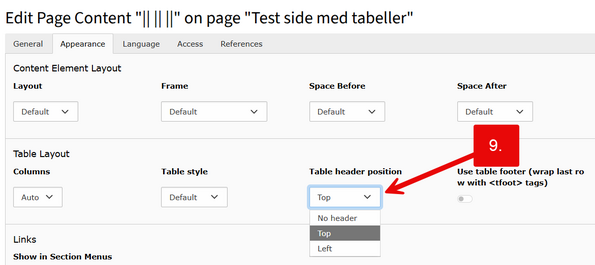
- Change table header position from No header to Top row or Left column
2. Create and style your table directly in the text editor
2. Create and style your table directly in the text editor
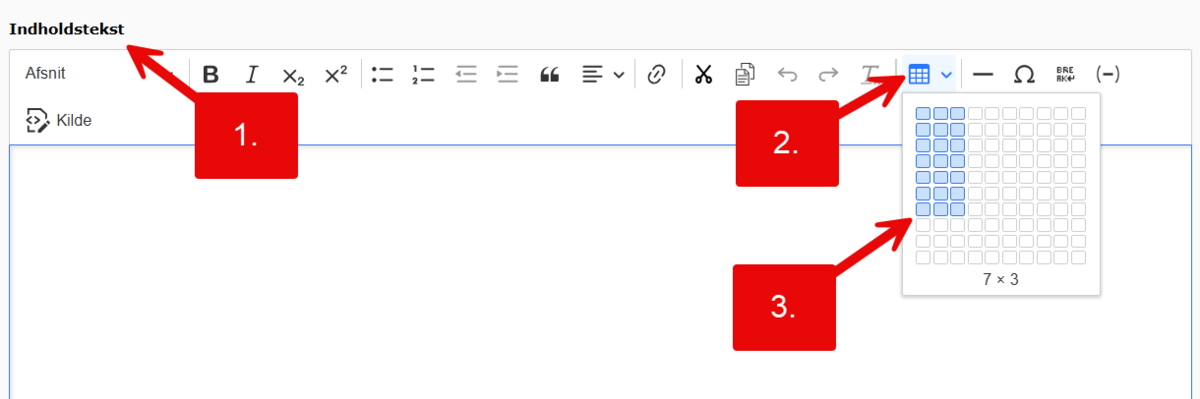
- Go to the text editor where you want to display a table
- Select Insert table in the text editor
- Choose the number of columns and rows
Note! In the small overlay, you can select a maximum of a 10x10 table. After you have created the table, you can add and remove columns and rows.
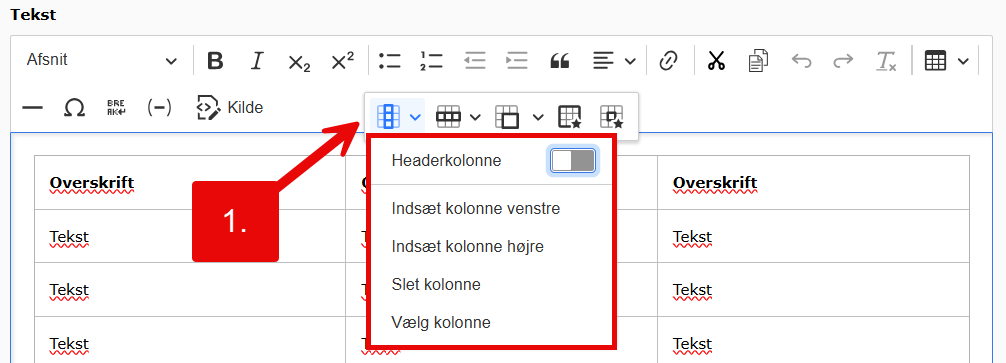
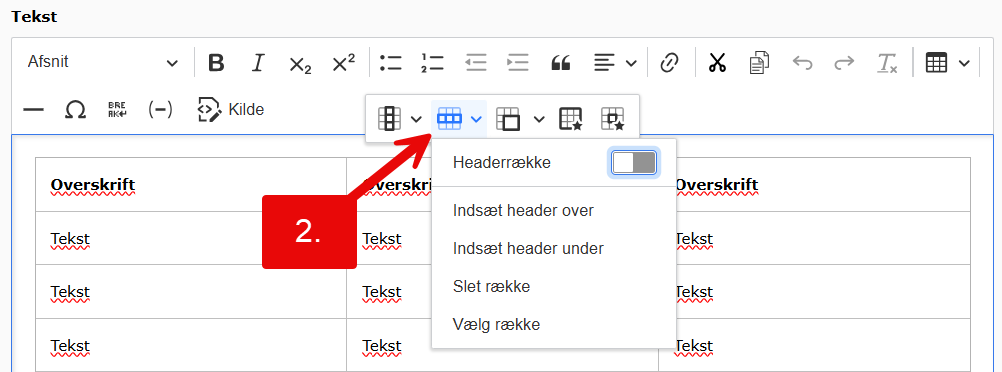
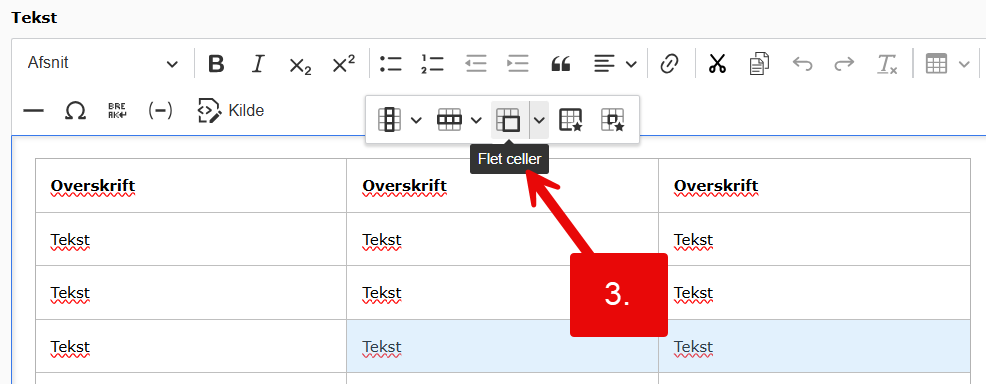
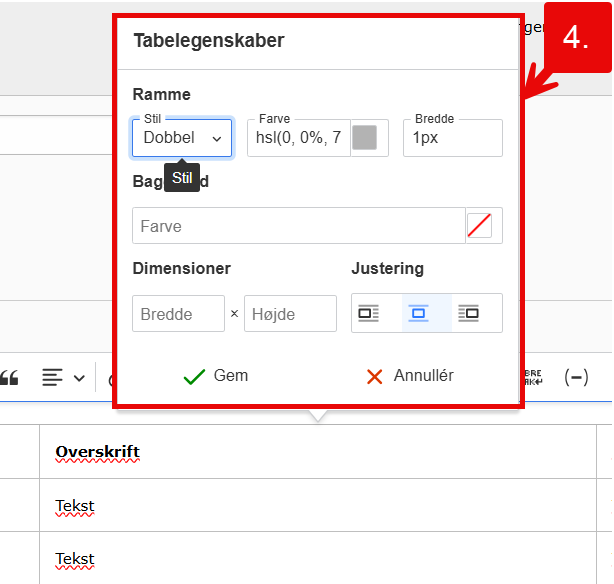
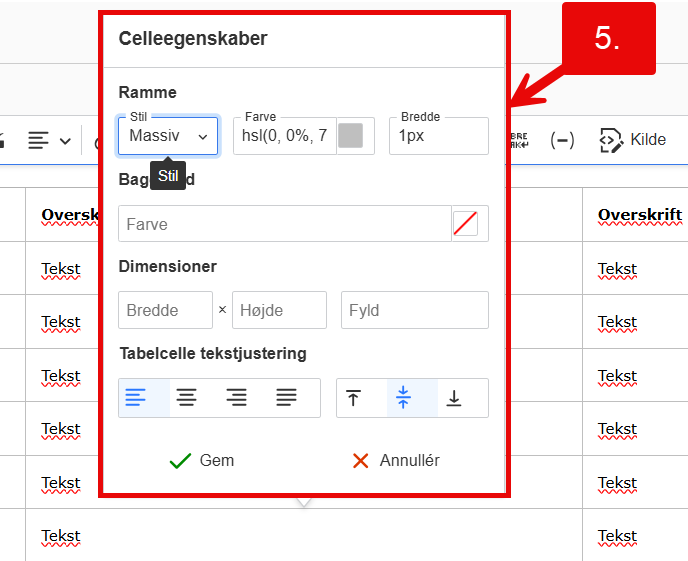
Click inside one of the cells and five options will appear, allowing you to style cells, rows, columns, background color, borders, text alignment, etc.:
- Column
- Row
- Merge cells
- Table properties
- Cell properties
Example of Table Element (Table Wizard)
| xx | yy | zz | vv |
|---|---|---|---|
| 11 | 12 | 13 | 14 |
| 21 | 22 | 23 | 24 |
| 31 | 32 | 33 | 34 |
| 41 | 42 | 43 | 44 |
| 51 | 52 | 53 | 54 |
Example of a styled table (in the Text Editor)
| Overskrift | Overskrift | Overskrift |
|---|---|---|
| Tekst | Tekst | Tekst |
| Tekst | Tekst | Tekst |
| Tekst | Tekst | Tekst |
| Tekst | Tekst | Tekst |
| Tekst | Tekst | Tekst |
| Tekst | Tekst | Tekst |