Timeline
The timeline allows you to provide users with a visual presentation of an application process or another process where it is important for users to quickly get an overview of, for example, key deadlines.
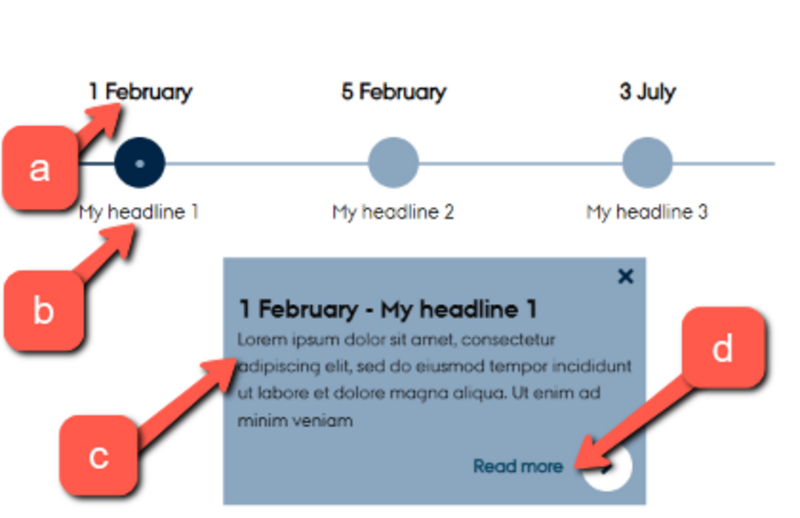
The timeline is interactive. When users click on a point in the timeline, it is highlighted in a different color, and an additional text box opens with more information about that point. At the bottom of the text box, there can be links to more detailed information.
The timeline is responsive, meaning it can also be used on small screens such as mobile phones.
NOTICE:
- To create or edit a timeline, you will need to work with HTML code, so you'll need to be comfortable with that. However, no special knowledge is required, as the guide provides very precise instructions on what to do.
- The timeline only works with the 2016 page layout. If you're unsure about which page layout you're using on your web pages, you can get assistance from your local websupport.

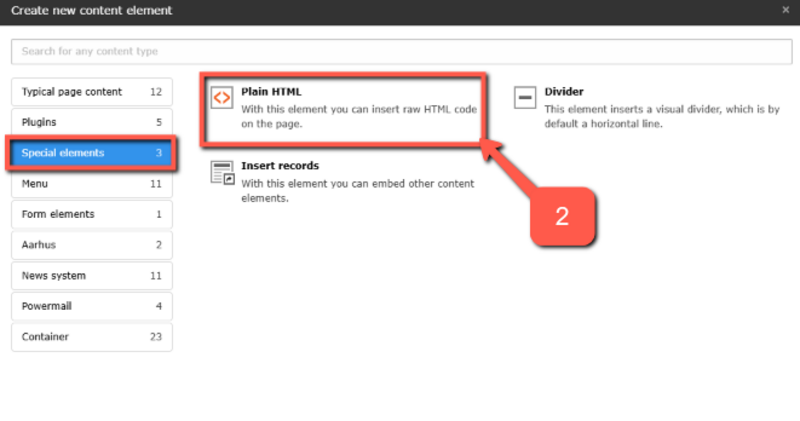
Edit the content in the timeline
Edit the content in the timeline
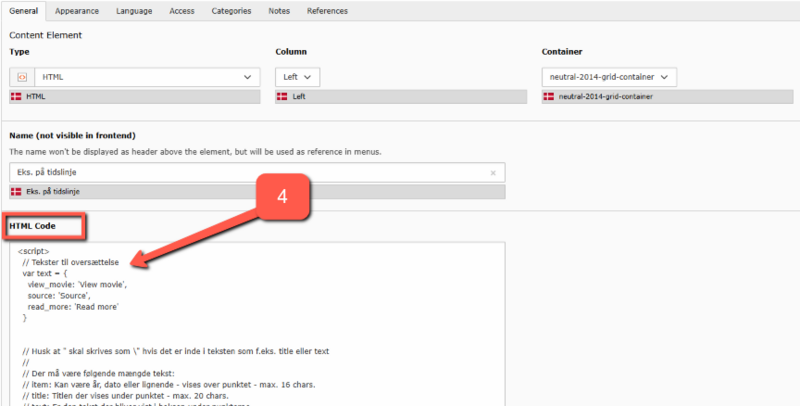
When you need to edit the content of your timeline—whether you have just created it or need to make changes to an existing one—you will need to work directly with the HTML code. For each point in the timeline, fill in the following details:
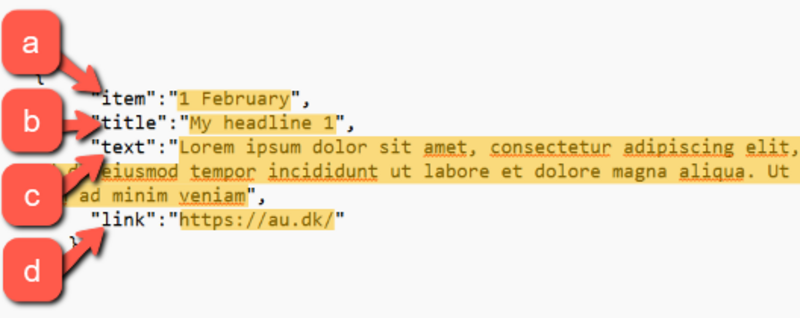
a. item: This can be a year, date, or similar. It appears above the point. Max. 16 characters.
b. title: The title. It appears below the point. Max. 20 characters.
c. text: Detailed text in the box that opens when you click on a point.
d. link: URL to the page that should be linked. If no page is to be linked, simply remove the URL.
Replace the text highlighted in yellow in the image below with your own text, i.e., where it says 1 February, My headline 1, etc. Note that you need to be very precise in only replacing the text between the quotation marks " ". All other characters have specific functions, and the code will not work if you modify or delete even a single character.
By default, the timeline consists of 5 points when you create a new timeline. The next section will guide you on how to add or remove additional points
Add or remove points in the timeline
Add or remove points in the timeline
Each point in the timeline consists of the HTML code below. To add an extra point to the timeline, copy this code (place the cursor in the field, press Ctrl + A, and then Ctrl + C). Then, paste the code into the timeline where you want the point to appear.
You can remove a point from the timeline by deleting the code for that point.