How to set access restrictions on a page
In some cases, it may make sense to restrict access to a page so that selected content elements are only visible after the user has logged in with a username and password.
Note: The username and password used here are not related to AU's two-factor authentication. The access restriction described here does not replace the security provided by collaboration and file sharing on Teams or SharePoint, which AU IT can assist you with, or Labbook.au.dk. Also, be aware that even if you restrict access to a page with a password, files linked from that restricted page may still be accessible without login. To prevent search engines from finding your files, you can use the 'Secure files' plugin. This ensures that files are only accessible if the user is logged into the page where the file is hosted.
If you determine that your page content should be visible to everyone at AU but not to anyone outside AU, you might consider IP-restricting the page. IP-restriction means that only computers on the AU network will be able to view the page. You set IP-restriction by going to the page properties, selecting the 'Access' tab, and setting 'IP Restriction' to 'University'.
Only user administrators can restrict access to a page. If you are an editor, you should ask your unit's local user administrator to do it for you.
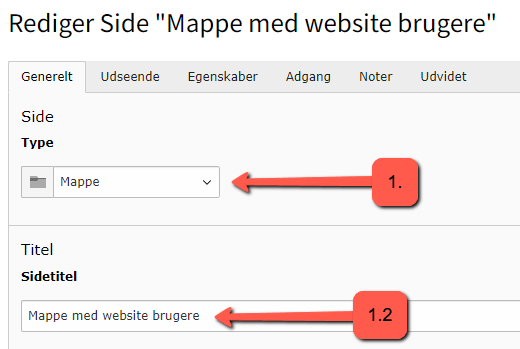
1. Create a new Folder page
1.2 Then give the new folder a suitable title, such as "Folder with Website Users".
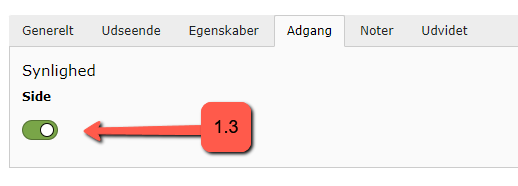
1.3 Ensure that the folder is visible under the 'Access' tab.
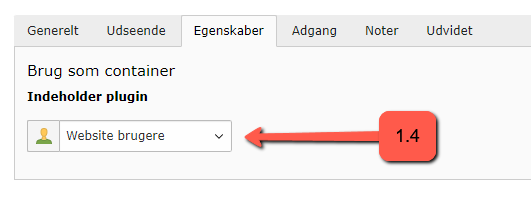
1.4 Select the 'Properties' tab. In the small menu 'Contains plugin', choose 'Website Users'.
1.5 Save and close the page.
2. Create a frontend user group
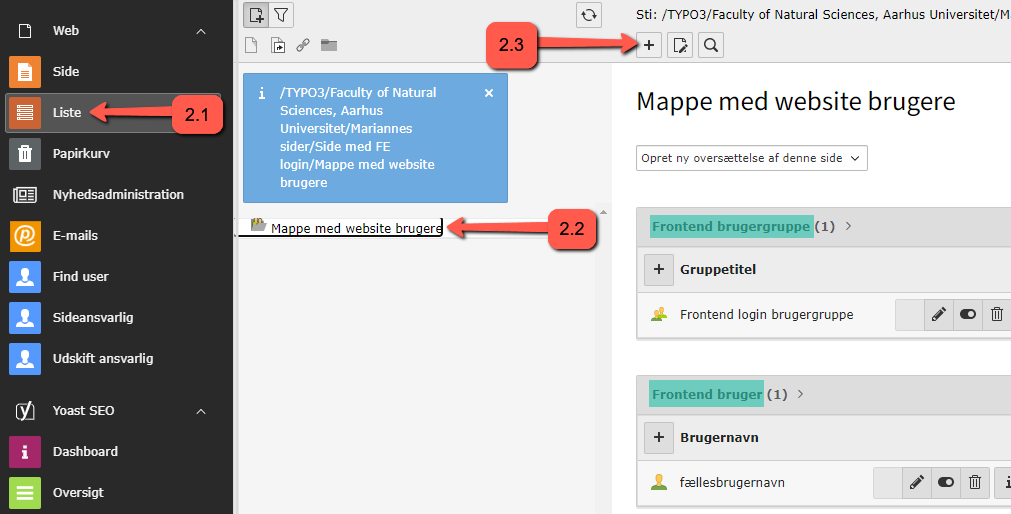
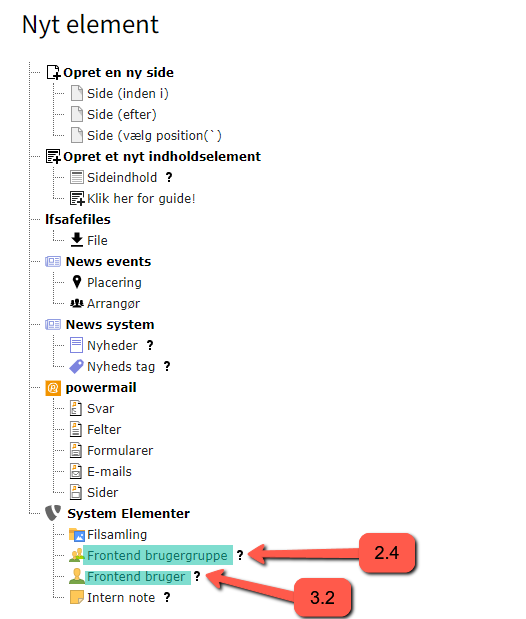
In the "Website Users" folder, you need to create two new TYPO3 elements (marked in green) as follows:
2.1 Click on the List module under WEB in the left column.
2.2 Click on the folder "Website Users" (or whatever you named your folder in step 1.2).
2.3 You need to create the first of the two new elements. Click on the small black plus (+) icon.
2.4 Under "System Elements," select "Frontend User Group."
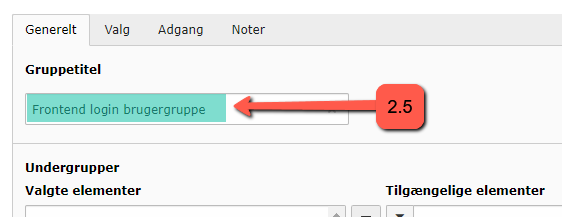
2.5 Give the group a well-defined and descriptive name. Enter this name in the "Group Title" field. It is important that the group name is descriptive so you can later find it among possibly 20 other group names. Optionally, add a description under the "Notes" tab to help you remember what this user group is for.
2.6 Save and close the element.
3. Create a frontend user (username and password)
3.1 Click again on the small black plus + to create a new element (see step 2.3 above).
3.2 Under System Elements, select Frontend User this time.
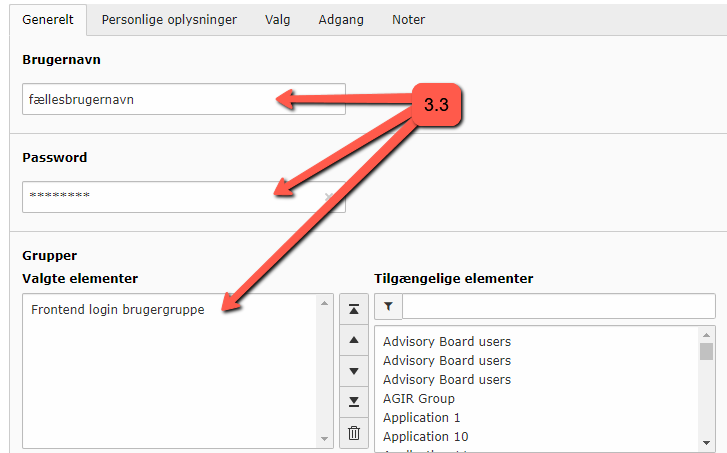
3.3 Under the General tab, do the following: Enter the shared username and password that you want to provide and share with users who should be able to log in. Then click on the group title under 'Available Elements' and find the title you gave the group in step 2.5 (see arrow no. 2.5 above, where the user group in this example is named "Frontend login user group"). Note that you are the one determining the username and password, and the chosen username and password are not related to other login information at AU.
3.4 Save and close the element.
4. Insert a login form
In the following, you will learn how to insert a login box so that your selected elements or pages are only visible if a user is logged in with the credentials you provided to "Frontend user" in point 3.3 above.
4.1 Find the page where you want to place the login box, e.g., on the homepage.
4.2 Click on + Content at the location on the page where you want to place the login box.
4.3 Now select the tab Form elements and then click on the Login form element.
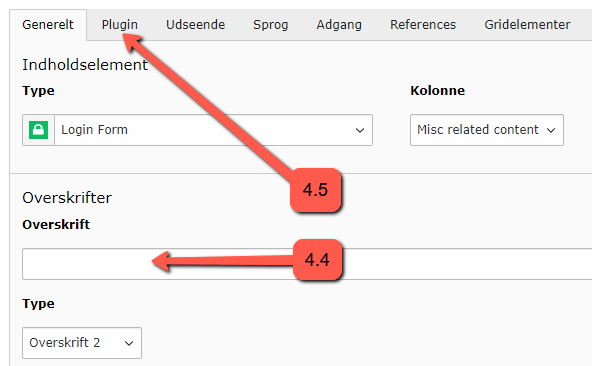
4.4 Give the login element a suitable title (possibly hidden) in the General tab.
4.5 Now click on the Plugin tab.
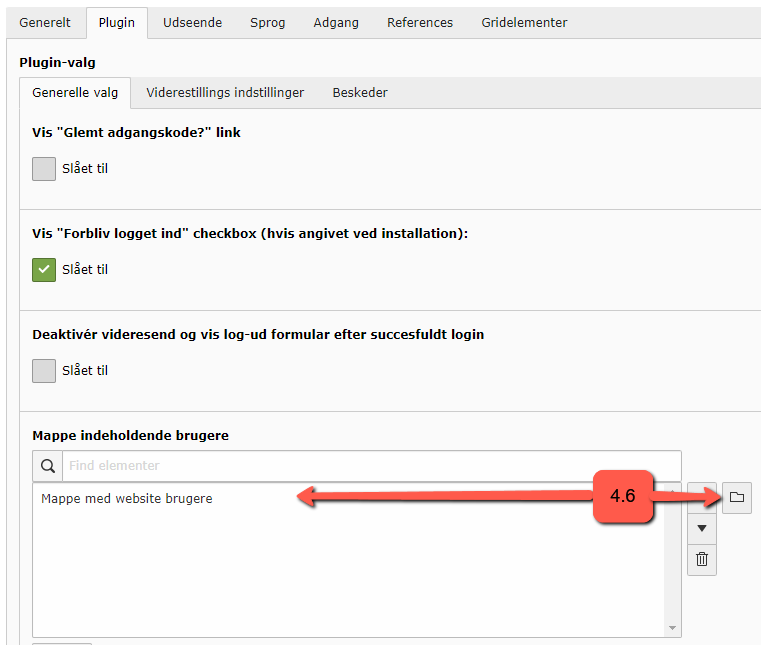
4.6 You need to specify which user group can log in: Click on the General options tab under Plugin. Under Folder containing users, navigate to your folder with Frontend user group and Frontend user, i.e., the name you gave the folder in point 1.2 (in this example, Folder with website users).
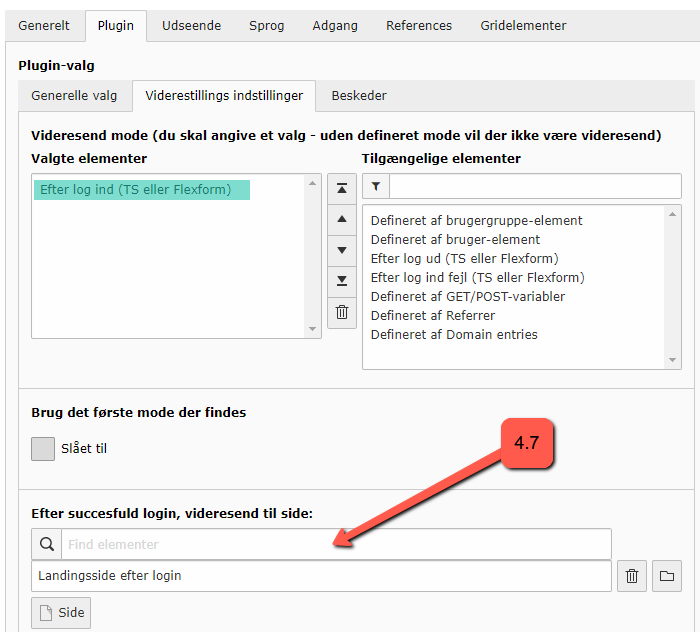
4.7 In the Redirect settings tab, you can specify which page the user should land on after a successful login. Make sure that After login (TS or Flexform) is marked in green.
4.8 Save and close the element.

5. Determine which elements or pages should only be visible after login
Hide elements
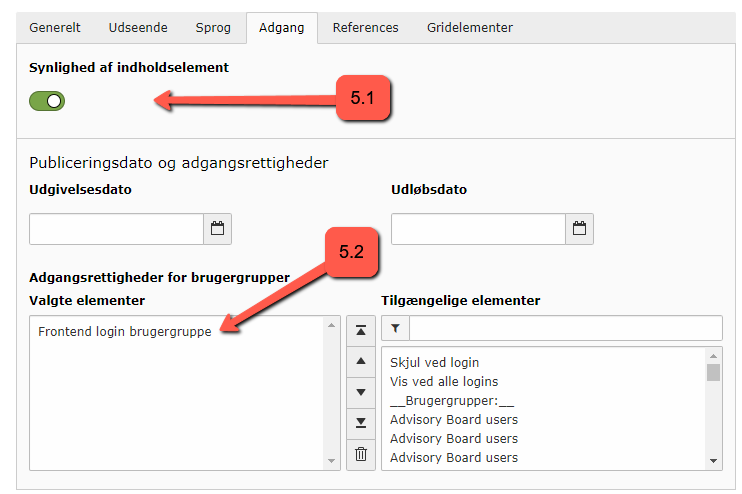
5.1 To hide an element on a page from users who are not logged in, first edit the individual element. Open the element and click on the Access tab. Make sure the element is set to visible.
5.2 Next, find and select the group's title under Available elements (see point 2.5 where you named the group).
5.3 Save and close the element. The element is now hidden from users who are not logged in.
Hide entire pages
The only difference when hiding a page compared to an element is that instead of editing the Access settings for the individual element, you will edit the Access settings for the page in the page properties. Otherwise, you can follow points 5.1-5.3 above.
6. Completion: Test your login and add messages
You have now completed the setup for access-restricted pages and elements. Click on the 'View Website' icon at the top of the page with the login element and test the login from the frontend. If everything works as expected, you can now provide the login information (username and password) to the group of people who should be able to view the access-restricted elements or page.
You can add messages that the user will encounter in the frontend before and after login. To do this, go to the 'Plugin' tab of the login element in the backend, and then click on the 'Messages' tab. Fill in the fields, save, and view the page.