Contact box
In TYPO3, we have two different boxes for contact information. One box is suitable for displaying contact details of individual people (Contact Box 1), while the other box is a dropdown list of various contact details (Contact Box 2). Contact Box 1 is created by your local web support, while you can create Contact Box 2 yourself.
Contact box 1
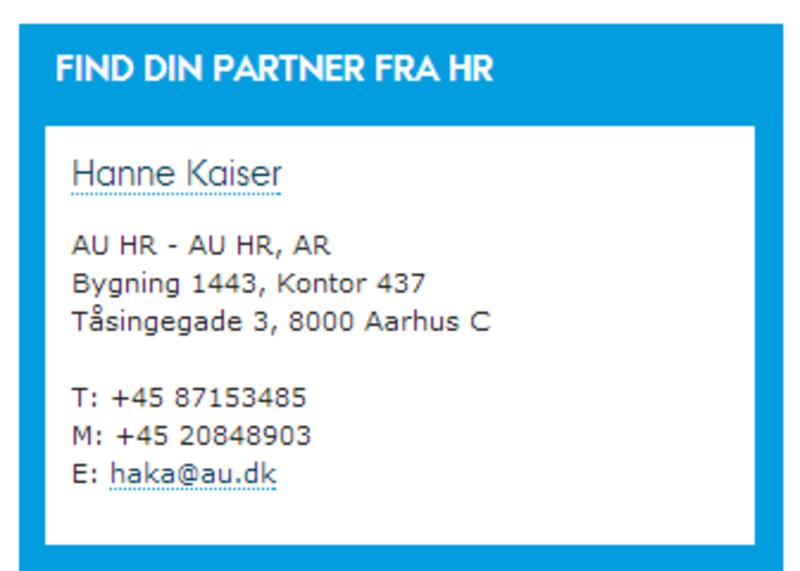
Contact details are displayed within the box itself.
Used for a small number of contacts, e.g., partners in administration of a unit.
This variant is set up by your local websupport.
However, it is your responsibility to ensure that the contact details are updated regularly if the unit acquires a new partner.
Contact box 2
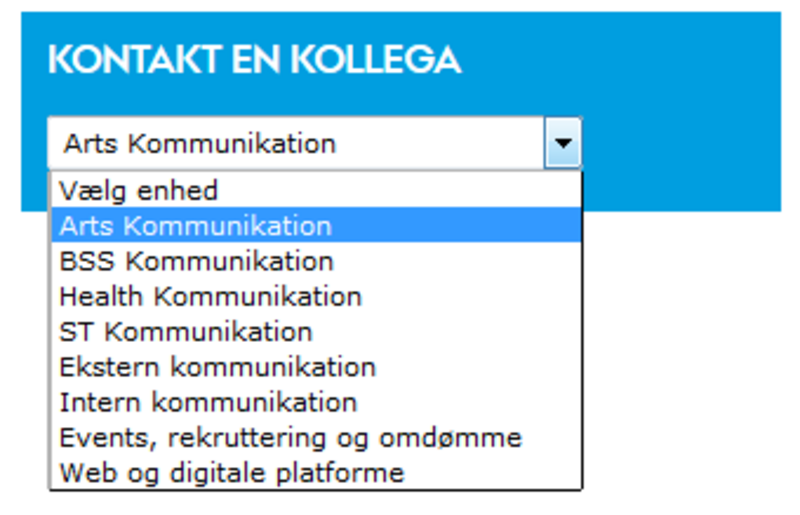
Using a dropdown list links to different pages with contact information.
This is used when there are many contact persons, such as contact details for several different units.
You can set up this variant yourself. See the instructions below.
You can also use it for other types of content beyond contact information.
Contact box 2 - dropdown
Contact box 2 - dropdown
Embed Contact Box 2 with a dropdown
To create Contact Box 2, you need to insert an HTML element on your page. The following guide will help you generate the HTML code to insert into the HTML element. Start by filling out the fields in the code generator at the bottom of this guide:
- Title: The title for the contact box, e.g., "Contact a Colleague."
- Help Text: Optionally, insert a brief description of the contact information, e.g., "Find contact details for your colleagues in AU IT." This field is optional.
- For the 1st Option: Insert the link to the page you want to link to in the first field, and the link text in the second field.
- Insert up to 10 links in total in the subsequent fields.
- Click the Get Code button.
- Copy the code that has been generated in the bottom field.
Now, use this code to create the contact box on your page. Do this using the HTML element type:
- Create a new element on your page by clicking the + Content icon.
- Choose the "Plain HTML" element under the Special Elements tab.
- Name the element in the Name field. This name will not be visible to users.
- In the HTML Code field, insert the code you generated in the code generator.
- The element is now complete. Save and close.
Code generator for dropdown contact box
Headline:
Help Text (optional):
| Link | Linktekst | |
|---|---|---|
| 1. Option | ||
| 2. Option | ||
| 3. Option | ||
| 4. Option | ||
| 5. Option | ||
| 6. Option | ||
| 7. Option | ||
| 8. Option | ||
| 9. Option | ||
| 10. Option | ||