Overview of all content elements in TYPO3
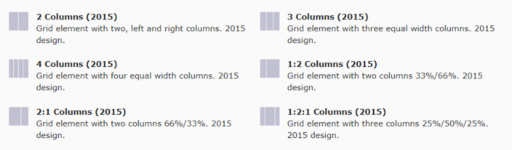
This page lists all the different types of elements you can insert into your TYPO3 page. Under each example, you'll find a link to the corresponding guide.
You can arrange your elements into column elements (grid elements or containers), as has been done on this page. This way, you can control where on the page the content is displayed. See the guide to grid elements.
Focus field

Welcome to AU Elitesport
Empowering elite athletes to pursue their sporting ambitions.
Collapsible container
Collapsible container (open)
Collapsible container (open)
You can choose whether the element should be expanded or collapsed by default.
Collapsible container (closed)
Collapsible container (closed)
You can choose whether the element should be expanded or collapsed by default.
Banner Element I (transparent text field)



Banner Element II (Solid color text field)


Buttons
PURE-plugin – many variants for displaying staff and publications
Displaying contact information for staff is managed using a PURE plugin. This ensures that contact details are always up to date, whether it’s for an individual or an entire department, which can be further subdivided into categories like VIPs and TAPs. The element can be customized in various ways, ranging from minimal information to business cards, image displays, and different types of lists.
It is possible to display double business cards with fields for Research Areas and Extra Text for Website if they are filled out in PURE.
Publication lists can also be created using the PURE plugin.
Minimal information
Business card
Double business card with unit and research areas

Double business card with unit and additional text for the website

List view
Image view


Contact box
Contact box 1
-
HR
-
20881745
-
-
GSTS
-
87151253
-
-
Education
-
87151198
-
-
IT
-
87157794
-
-
Economy
-
87157665
-
87158258
-
87157769
-
30502430
-
Contact box 1
Contact details are displayed within the box itself.
Used when there are only a few people, for example, to show a department's partners in administration.
This variant is set up by the local websupport.
However, it is the editor's responsibility to update the contact details if the department acquires a new partner.
Contact box 2
Contact colleague in AU IT
Contact box 2
Links to other pages with contact details.
Used when there are many people, for example, to display contact information for all employees in a unit.
You can set up this variant yourself.
You can also use it for other types of content beyond contact information.
Staff service box
Medarbejderservice på AU
Værktøjer, vejledninger og serviceydelser for alle ansatte
Slå op i emneindekset:
Used, among other things, on local employee portals to provide direct access to shared information for all AU staff.
Embedding video from YouTube or Vimeo
You can embed video code on your page using an iframe. For embedding YouTube videos, we also have a special plugin; see below.
Display LaTeX using MathJax
$a^2+b^2=c^2$
\[ \sum_{k=1}^n\left.\frac{1}{k!}\frac{d^k}{dt^k}\right|_{t=0}f(u(t)) + \int_0^1 \frac{(1-t)^n }{n!} \frac{d^{n+1}}{dt^{n+1}} f(u(t))\, dt. \]
\[ \sum_{n=1}^\infty \frac{1}{n^2} = \frac{\pi^2}{6} \]
\begin{align*} \sum_{n=1}^\infty \frac{1}{n^2} & = 1 + \tfrac{1}{4} +\tfrac{1}{9}+\cdots \\ &= \frac{\pi^2}{6} \end{align*}
Plugin for displaying YouTube
With the video plugin, you can easily display YouTube videos on your website in a way that fits the design.
Image slider
An image slider allows you to create a photo element where users can either manually switch between images or the switch happens automatically. This creates an effect similar to a photo carousel or slideshow.
Here is an example of how an image slider looks:


Timeline
Timeline
The timeline allows you to provide users with a visual presentation of an application process or another process where it is important for users to quickly get an overview of, for example, key deadlines.
The timeline is interactive. When users click on a point in the timeline, it is highlighted in a different color, and an additional text box opens with more information about that point. At the bottom of the text box, there can be links to more detailed information.
The timeline is responsive, meaning it can also be used on small screens such as mobile phones.
NOTICE:
- To create or edit a timeline, you will need to work with HTML code, so you'll need to be comfortable with that. However, no special knowledge is required, as the guide provides very precise instructions on what to do.
- The timeline only works with the 2016 page layout. If you're unsure about which page layout you're using on your web pages, you can get assistance from your local websupport.

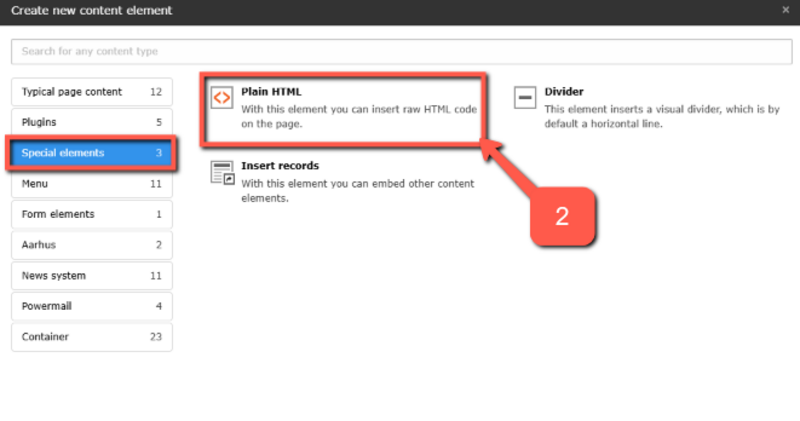
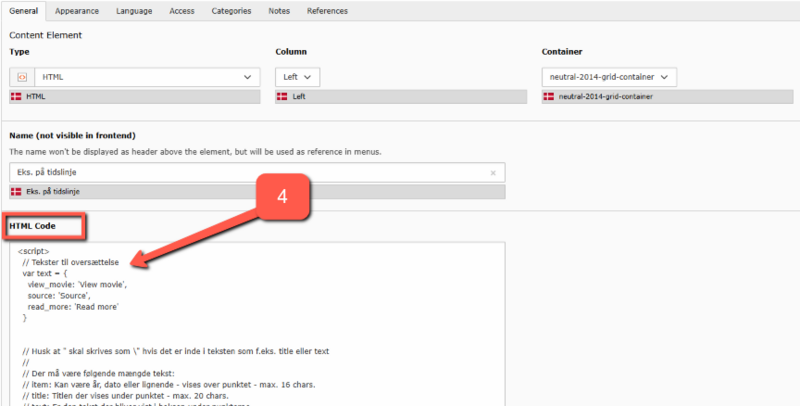
Edit the content in the timeline
Edit the content in the timeline
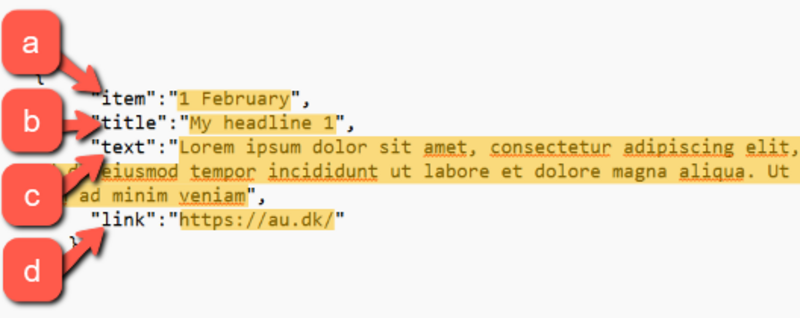
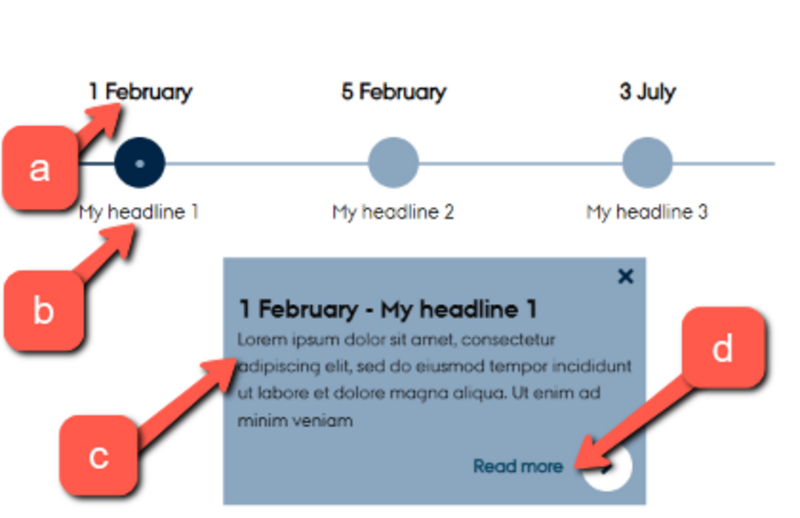
When you need to edit the content of your timeline—whether you have just created it or need to make changes to an existing one—you will need to work directly with the HTML code. For each point in the timeline, fill in the following details:
a. item: This can be a year, date, or similar. It appears above the point. Max. 16 characters.
b. title: The title. It appears below the point. Max. 20 characters.
c. text: Detailed text in the box that opens when you click on a point.
d. link: URL to the page that should be linked. If no page is to be linked, simply remove the URL.
Replace the text highlighted in yellow in the image below with your own text, i.e., where it says 1 February, My headline 1, etc. Note that you need to be very precise in only replacing the text between the quotation marks " ". All other characters have specific functions, and the code will not work if you modify or delete even a single character.
By default, the timeline consists of 5 points when you create a new timeline. The next section will guide you on how to add or remove additional points
Add or remove points in the timeline
Add or remove points in the timeline
Each point in the timeline consists of the HTML code below. To add an extra point to the timeline, copy this code (place the cursor in the field, press Ctrl + A, and then Ctrl + C). Then, paste the code into the timeline where you want the point to appear.
You can remove a point from the timeline by deleting the code for that point.