How to create an event
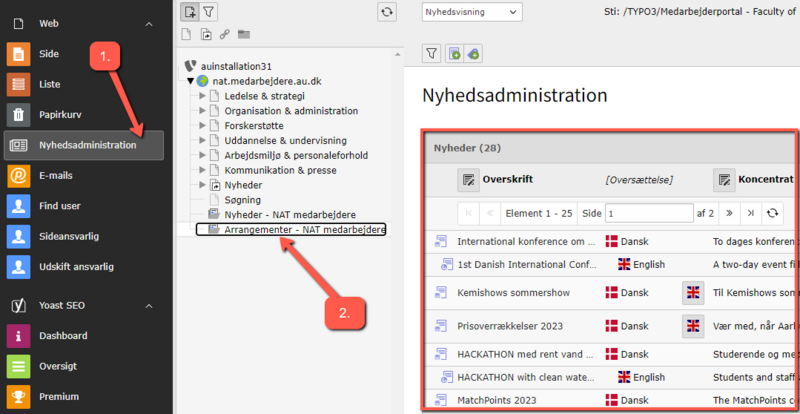
To create events, you need access to the News Administration module. Contact your web support if your editor role does not grant access to this module.
Click on the folder in the sidebar that contains the events. The list of all events will now appear.
- Click on the News Administration module.
- Click on the folder in the sidebar that contains the events. The list of all events will now appear.
Create event (news record)
Create event (news record)
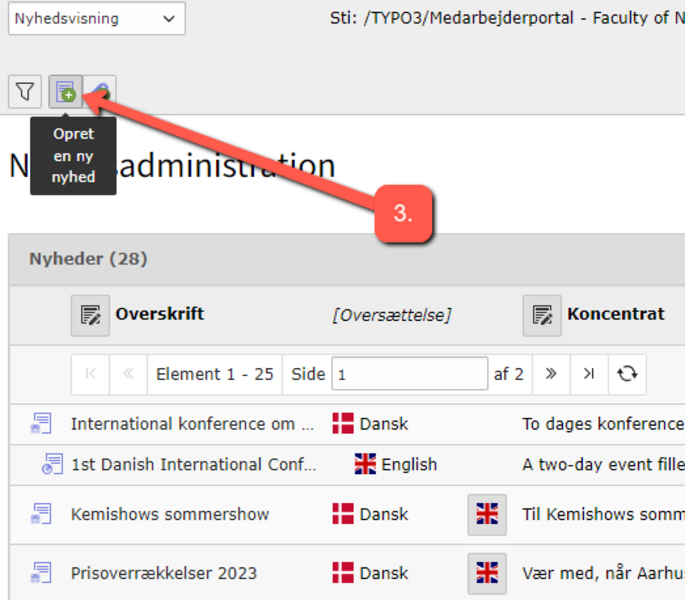
- Click on + Create new news record. A series of tabs will appear, which we will review below.
Note that you initially create an event as a news item, and then in the Details tab, you mark the field Is event.
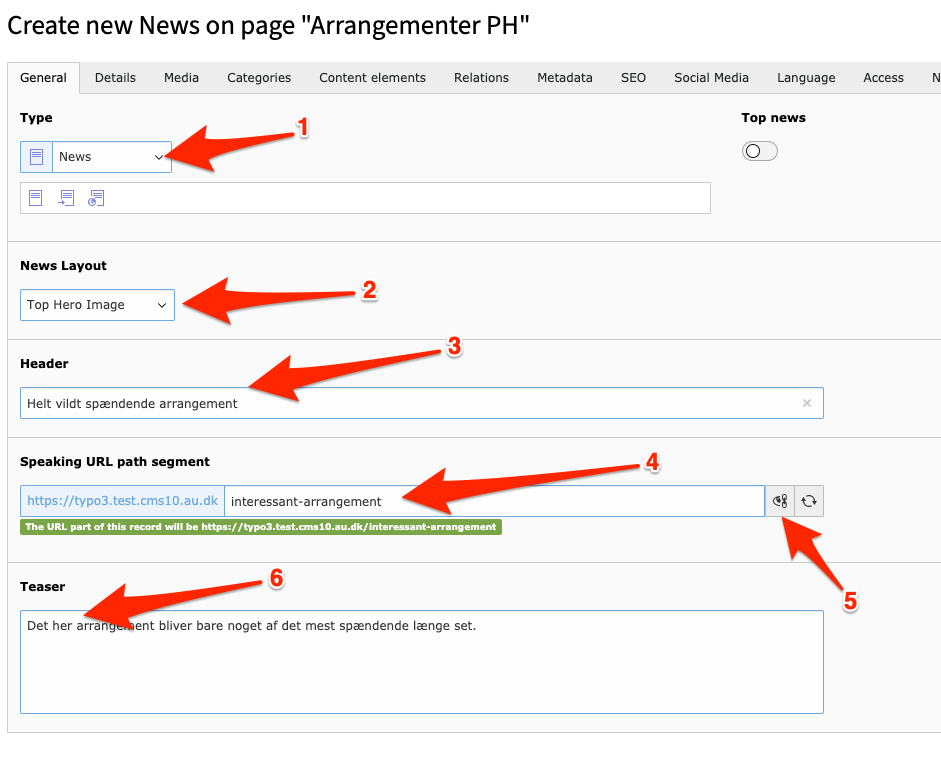
General
General
- Select Type:
- Regular news: Used for standard events.
- Internal link: Choose this if you want to link to a page in your site tree or another event in your events folder.
- External page: Use this to link to any URL.
- Choose Layout - with or without Hero Image. See examples of views
- Fill in Header with the event's title.
- Optionally, specify your desired URL segment.
- You can choose to either enter the URL segment yourself or have it generated automatically from the event title (click Recalculate URL).
- Complete the Teaser.
Remember to save when you are finished.
Details
Details
Under Details, specify that it is an event:
- Mark the field Is event.
- Click OK in the dialog box that appears.
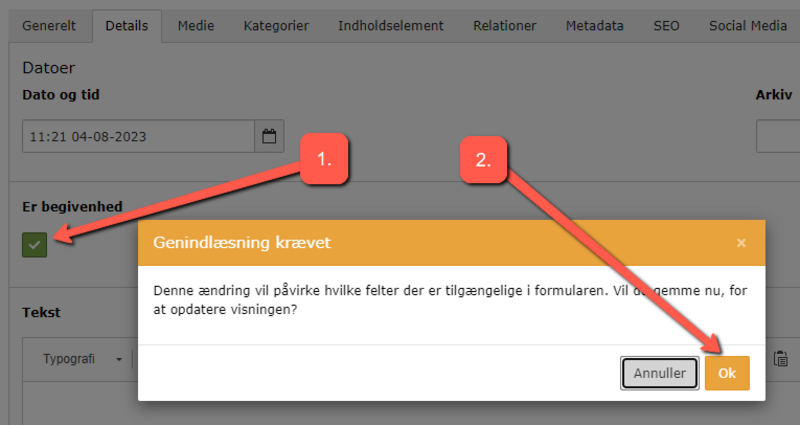
The tab will now reload with a series of fields unique to events.
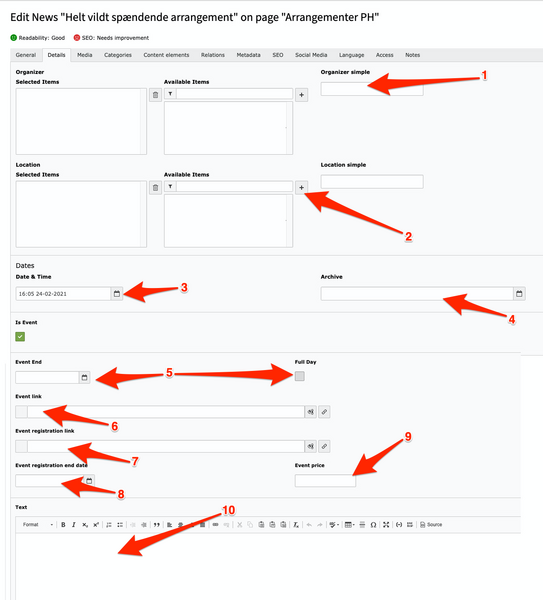
- Enter the organizer of the event here. You can use the simple method of typing a line of text or click on + next to "Available items" to add more details.*
- You can also choose between the simple method and an extended model here.*
- Enter the date of the event.
- Set an archive date if applicable (which is rarely relevant for events).
- Select the end date of the event and whether it is an all-day event.
- Insert a link to the event’s website if applicable.
- If the event has a registration website, you can add the link here.
- Choose a date when the registration link should expire.
- Enter any applicable price.
- Enter the body text for the event.
* Note that the extended options for setting the organizer and location for an event only work if the event is placed in an event folder. Contact your local IT support if you are unsure whether your events are created in an event folder.
Media
Media
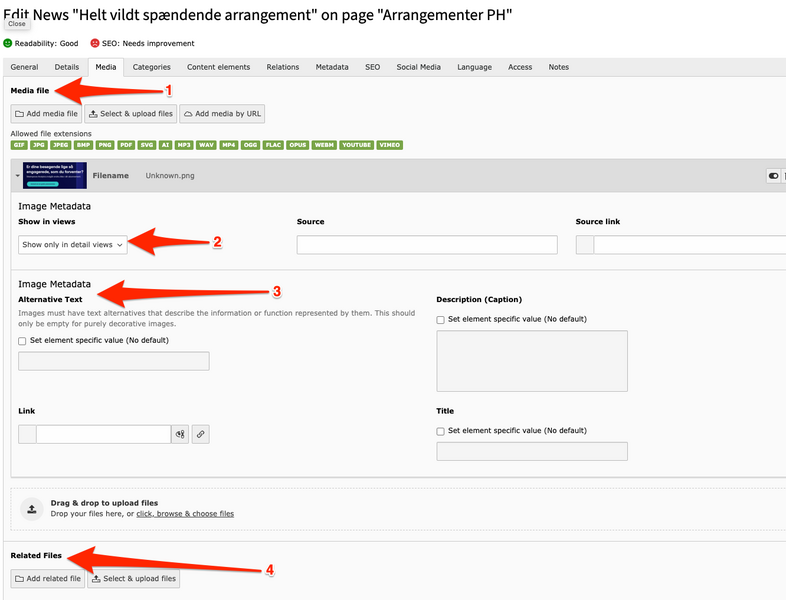
- Start by choosing how you want to upload your media file. You can either use a file that is already uploaded in the file list, upload a new file from your computer, or insert the URL of a media file.
- In most cases, you will be uploading images this way. The following instructions will therefore focus on the use of images: Select the option to show the image in all views (Show in all views). Event lists do not display images, so there's no need to choose any setup other than all views.
- Remember to fill in the metadata for the image you upload, such as alt text or image description. The description/caption will be displayed under the image in the view.
- At the bottom of the Media tab, you can add related files to your event. These will be placed at the bottom of the event.
- Note that the images will be displayed in portrait format. Consider whether it would be a good idea to crop the image to better fit the format.
Categories
Categories
Select categories in the Categories tab. Only one of the categories you assign to your news will be displayed in your news list. It will be the category that appears first (at the top) in the category tree. No categories are shown on the actual news item.
The categories you select can be used to filter a news list, allowing you to choose specific news items. Read more about categories.
Content element
Content element
Here, you can build your news article with content elements. Inserted elements will always be placed after the headline, summary, and the content you filled out in the Details tab.
- Read more about creating news with content elements (for advanvced editors)
Relations
Relations
Here, you can select related news from your own news folder. You can also insert links to other related pages. Related news will be displayed below your news item in the view.
Additionally, you can add tags. Read more about tags
Metadata
Metadata
Here, you can add the author's name and email. This will be displayed with the news item along with the creation date as a link to email the author.
SEO
SEO
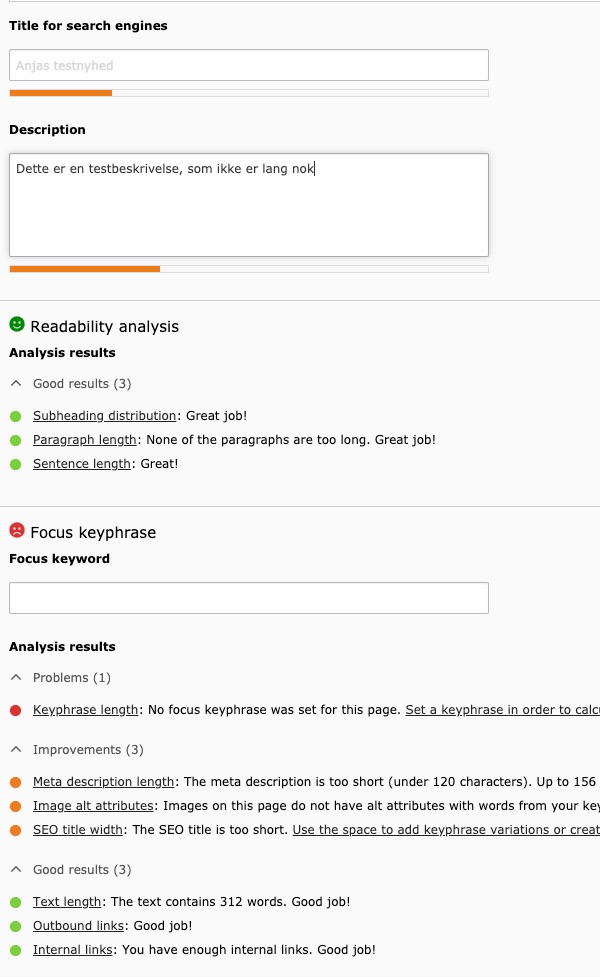
On this tab, you will find the fields necessary for search engine optimization. We use a plugin called Yoast SEO, which provides clear graphical indicators of how your page title and description perform. You can edit directly in the fields and get real-time analysis while editing.
Read more about Yoast SEO plugin
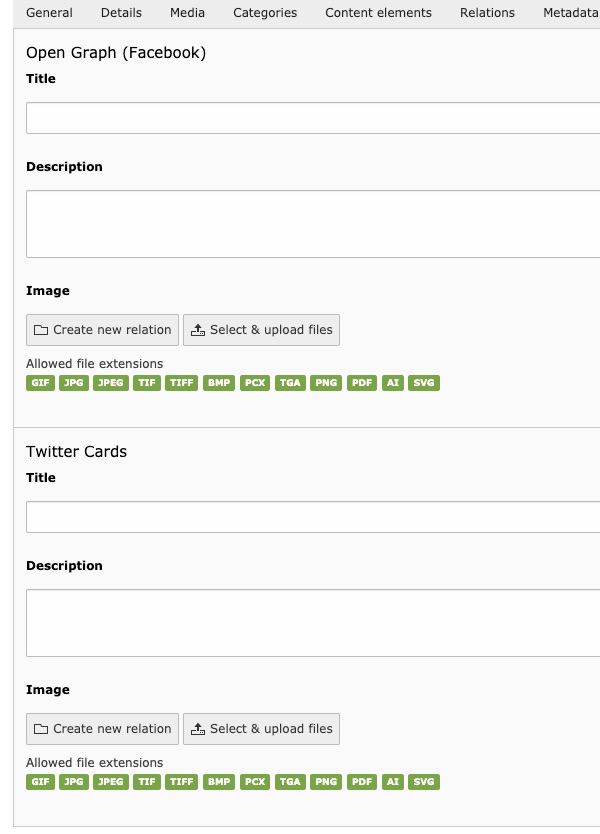
Social Media
Social Media
On this tab, you can write Open Graph texts for use when sharing on social media. This allows you to specify a special image, description, and text that will appear when you share on platforms like Facebook or Twitter.
Language
Language
The Language tab indicates which language version of your website the news will be displayed on. You will rarely need to do anything there.
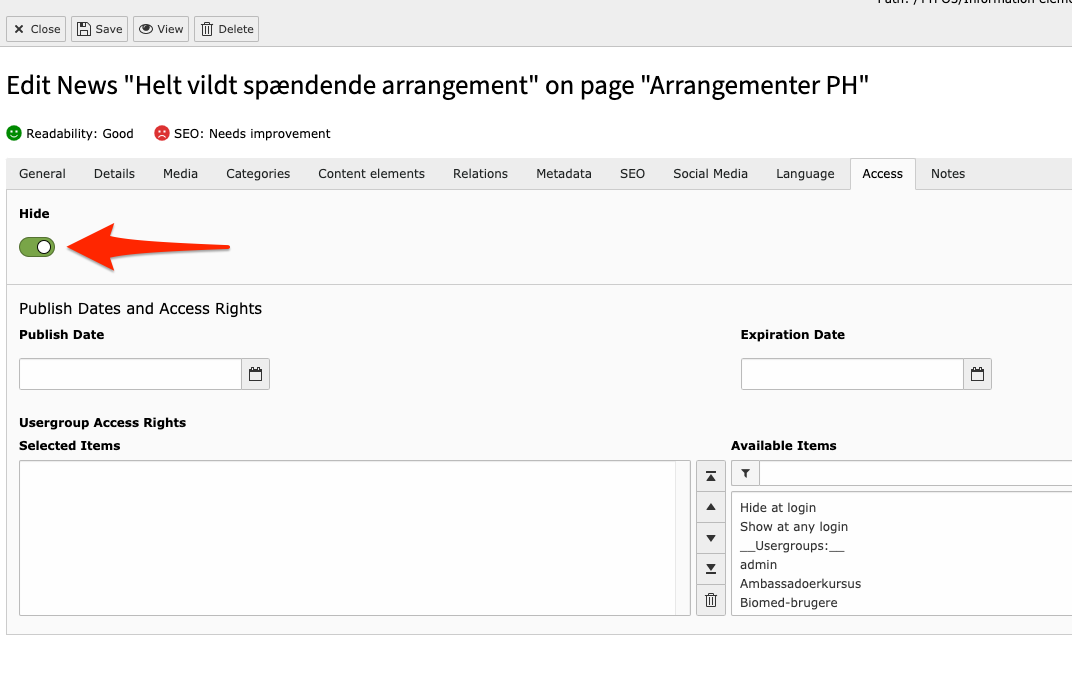
Access
Access
When everything else is ready, make the news visible by clicking the button next to Hide in the Access tab. The news will now be online and will appear on news lists set to show news from your events folder.
Notes
Notes
Here you can add notes that will not be visible in the frontend.
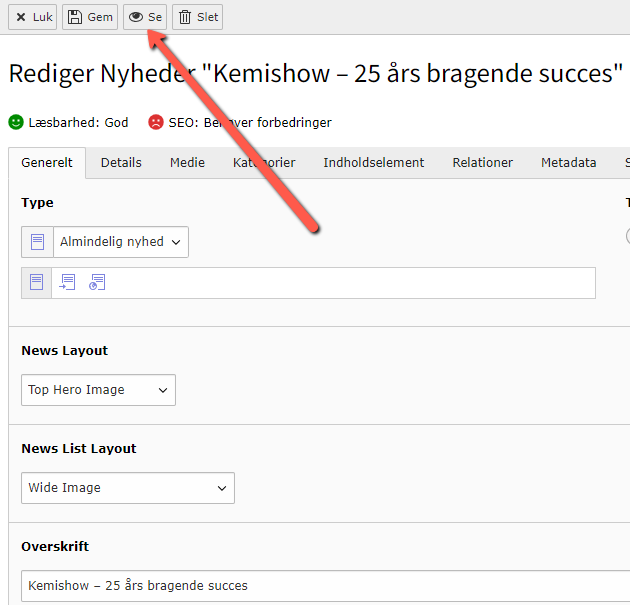
Preview your news item before publishing
Preview your news item before publishing
For a Regular news item (or event), you can click on View to preview the news before publishing it (Unhide) in the Access tab. You can send the cryptic URL of your unpublished news item or event to collaborators for review, but it must not be used for other purposes.
Note that this option is not available if the type is Internal or External page.